Curly Hair Guide

I’ve always had a love-hate relationship with my hair. I didn’t start wearing it curly until I was in 5th or 6th grade, but even then, it’s been a continual work in process. I felt like I had it all down to science until I had Marin. Hormones, man. Oy vey. I lost an incredible amount of hair postpartum. I legitimately thought I was going bald! My curls got really weird, too. She’s now 19 months old, and I finally feel like I’m getting back into a good groove with my hair and I’ve learned a ton in the process. Here’s a look into the products I use, the process I follow, and how I got here.

DAY 3 HAIR
I cut all of my hair off in college - like pixie short. It sounded like this really cool & hip idea, but it was BAD. It still makes me cringe when I think back on it. YIKES! I immediately started growing it out and have had long hair ever since. Fast forward to January 2021 when I finally decided I was ready to part with my long hair and try something new.

BEFORE

AFTER
I’m LOVING shorter hair! Honestly, I think my locks just needed a really good trim after all of the hormonal roller coaster of having a baby, but the new cut feels great and is really easy to maintain.
Also something to mention… right before I cut my hair, I also went back to my roots and started (somewhat) following the Curly Girl Method again. So between a fresh cut, a method meant to encourage curl, and a few new products, I’ve seen VAST improvement in my hair.
Here are the products I’m using today:
P R O D U C T S
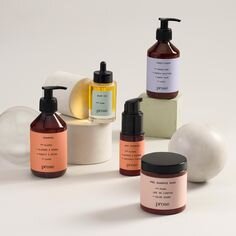
Custom Prose Hair Care - Prose is a custom hair care line. You fill out a survey online all about your hair, everything down to your zip code! The formulas are adjusted to meet your specific hair care needs and adjusted throughout the year as the weather changes. They’re also B-Corp certified. SO COOL! This is the first time I’ve ever tried Prose (they gifted this set to me), but I’ll admit I’ve been really happy with the products and plan to purchase on my own when I run out. If you use THIS LINK, you’ll receive $10 off your first purchase! Based on my results, Prose suggested the following items for me:
Shampoo - Some curly girls go the no shampoo route, but I’ve found my hair needs and wants a good cleanse about once a week.
Conditioner - This stuff is fantastic! All of my tangles come right out. I haven’t used a brush since using Prose.
Pre-Shampoo Mask - I apply this to damp hair about 30-minutes before I shower. I only use it once every 1-2 weeks, and I really like it.
Hair Oil - The directions say you can use 1-2 drops of this to add some moisture to your hair or as a pre-shower treatment. I’ve done both. I have to be careful about using it on my hair during a normal day because it can definitely be too much, but I’ve found just 1-2 drops on day 2 or 3 of my wash cycle is really nice. It smells awesome, too.
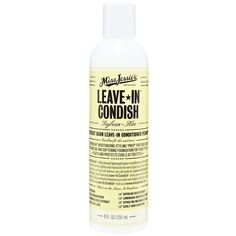
Leave-In Condish - I’ve used Miss Jessie’s products for YEARS. I just recently branched out to the Kinky Curly brand and really like it, so when this bottle of leave-in conditioner runs out, I may try something new.
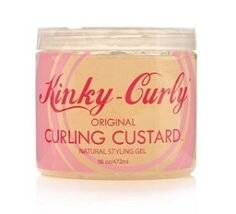
Curling Custard - I started using this 1-2 months ago and am hooked. My curls are much more defined yet I still have plenty of volume.
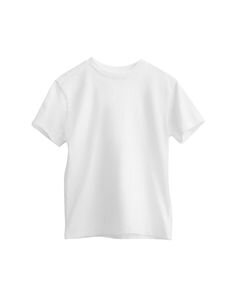
Old T-Shirt - I steal Tyler’s old white t-shirts to dry my hair. I always thought the whole “use a t-shirt, not a towel” thing was a little overkill, but I’ll admit I’ve seen vast improvement in my curls since converting.
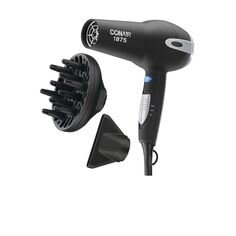
Hair Dryer + Diffuser - My hair dryer is ancient, but the one linked is similar. I’ve always used whatever diffuser comes with the hair dryer, but I’ve also heard rave reviews about this diffuser.
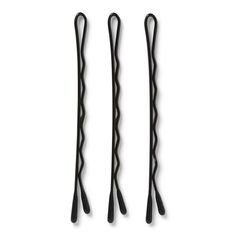
Bobby Pins - I never leave the house without bobby pins on hand. I can’t stand it when my hair is in my eyes, and these always do the trick.
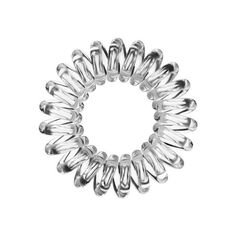
Hair Ties - These things look weird but do a great job of holding hair in place without getting tangled. I use them at night.

DAY 2 HAIR
Now when it comes to the process I follow, I’ve been struggling with the best way to share. I do most of the “work” while I’m in the shower which makes sharing rather um…. tricky. :) I’m going to write out the steps below and then I’ll also plan to share (& save to Highlights) a few videos on Instagram. Hopefully this is helpful!
PLEASE NOTE:
This may sound like a lot of steps or too time intensive, but I really think it evens out and is worth it. Plus, I’ve tried the “just wash and go” route. It doesn’t work for my curly hair. Not even a little bit. Curls need tender loving care! But here’s the thing - if you put in the time and do it right to start, I’ve found my curls stay for DAYS and take very little to be “ready”.
P R E - S H O W E R
When time allows, I’ll follow one of these processes - usually alternating between the two each week. If I’m short on time, I’ll move on to the “S H O W E R” process shown below.
Option 1: On damp hair, apply Pre-Shampoo Mask to lengths of hair. Let sit for 10-30 minutes.
Option 2: On dry hair, apply 10 drops of hair oil to lengths of hair. Let sit for 10 minutes.
S H O W E R
Apply Shampoo. Rinse.
Apply Conditioner. Let sit for 3-5 minutes. Rinse with head UPSIDE DOWN. Run fingers through hair to remove any tangles.
With head still upside down and hair soaking wet, apply Leave-In Conditioner using prayer hands.
With head still upside down and still soaking wet (dip head under shower head again, if needed), apply Curling Custard using prayer hands.
Gently scrunch soaking wet hair to encourage curl, leaving head upside down.
P O S T S H O W E R
Using an old t-shirt, immediately “dry plop” soaking wet hair. I lay the t-shirt on the floor of the bathroom and kneel down with my head still upside down. Gently place soaking wet hair in the middle of the t-shirt. Flip the side of the t-shirt furthest away from you up over your head so it’s now resting on your neck. Then pull the side closest to you up around your forehead. Using the sleeves of the t-shirt, secure the entire t-shirt around your head by either tying the sleeves together or clipping with a hair clip.
Leave it as-is for at least 10 minutes. This is usually when I apply lotion, sunscreen, get dressed, etc.
Remove t-shirt from head. Hair will likely still be fairly damp. Very gently scrunch hair using t-shirt to remove excess moisture. DO NOT RUB OR OVERLY DISTURB CURLS.
At this point, you can either air dry or use a diffuser to speed up the process. I always diffuse because I like big hair. :)
Make sure hair dryer is set to the Warm or Cool heat setting, not HOT. Using the medium speed and the diffuser attached, I always start with my head upside down. Gather curls together and fit as many into the diffuser head as possible. Raise diffuser up to scalp and LEAVE IT for at least 15-20 seconds. Remove diffuser, tilt head to one side, and raise diffuser up to scalp. LEAVE IT for at least 15-20 seconds. Keep repeating this process until curls are dry.
FYI - Step 5 can be a really lengthy process, especially if you have long hair. With that said, I find it’s one of the most critical for ensuring a long-lasting curly do’. I actually only dry my hair using a diffuser until it is 75-90% dry, not 100%. I dry it most of the way and then use a bobby pin to clip the front of my hair back. Then I let it air dry the rest of the way. This helps cut down on total time and is a great hack if you’re doing this at night or don’t have to be somewhere right away during the day.
At this point, you may be slightly worried because your curls are super defined, flat, and crunchy. DON’T WORRY! This is a good thing!
Once hair is dry - like 110% dry! Seriously, DO NOT move on until hair is COMPLETELY DRY - grab an old t-shirt or a silk scarf. Gently scrunch your hair. This is what a lot of curly girls refer to as “SOTC” - Scrunch Out The Crunch. Those big, soft, beautiful curls so many people want? THIS is how you get them.
I like a lot of volume, so next I flip my head over and put my fingers on my scalp and vigorously massage. This creates a bit of frizz but adds a ton of volume. If you wait to do this step until your hair is completely dry, your curls will remain AND you’ll have great volume.
Finally, I always pin my hair back with a bobby pin (I can’t stand hair in my eyes) and spray with a touch of aerosol hairspray.
A T N I G H T
Flip head over and put hair into pony tail on top of your head. Yes, it looks ridiculous. :) I do what they call a pineapple.
N E X T D A Y / R E F R E S H
This is likely not what most curly people would tell you to do, but it’s what I do and it works for me.
Take out ponytail.
Immediately grab hair dryer and diffuser. With hair dryer on HIGH temperature and MEDIUM speed, flip head upside down and diffuse hair all over.
Take diffuser off hair dryer and turn speed up to HIGH. For 10-20 seconds, blast hair all over with hot hair. I usually concentrate on my “bangs” and sides.
Flip head right side up, pin back with bobby pin(s) as needed, spray with a little hair spray, & DONE.
I can go a good four days before I start needing to wash my hair again. I can stretch it another day or two if I whip out some dry shampoo. So while it looks like a lot of steps and time on wash day, it makes getting ready SUPER easy and fast all those days after.

DAY 4 HAIR
This post is not sponsored or in partnership with any of the aforementioned brands but the article contains affiliate links. When you shop via the links above I may make commission on a sale at no additional cost to you. All opinions are my own.