Surface Mount Fixture DIY
At this point, there are very few lights in our house that we haven't DIY'd. I just can't get over how much money you can save and how easy it is to create something yourself! The designs from lighting manufacturers like Cedar & Moss or Schoolhouse Electric are absolutely beautiful, but I simply can't bring myself to spend the majority of my budget on lighting when I can make something very similar for a fraction of the price.
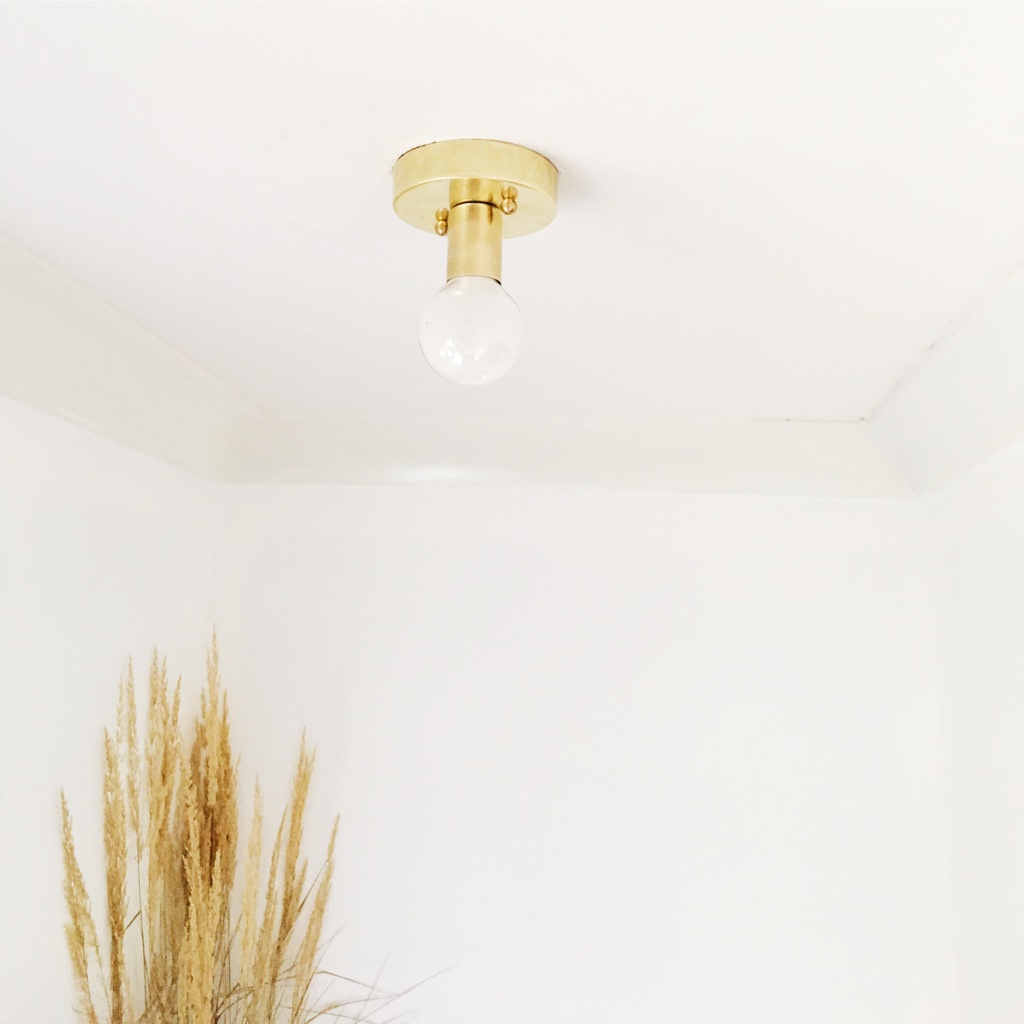
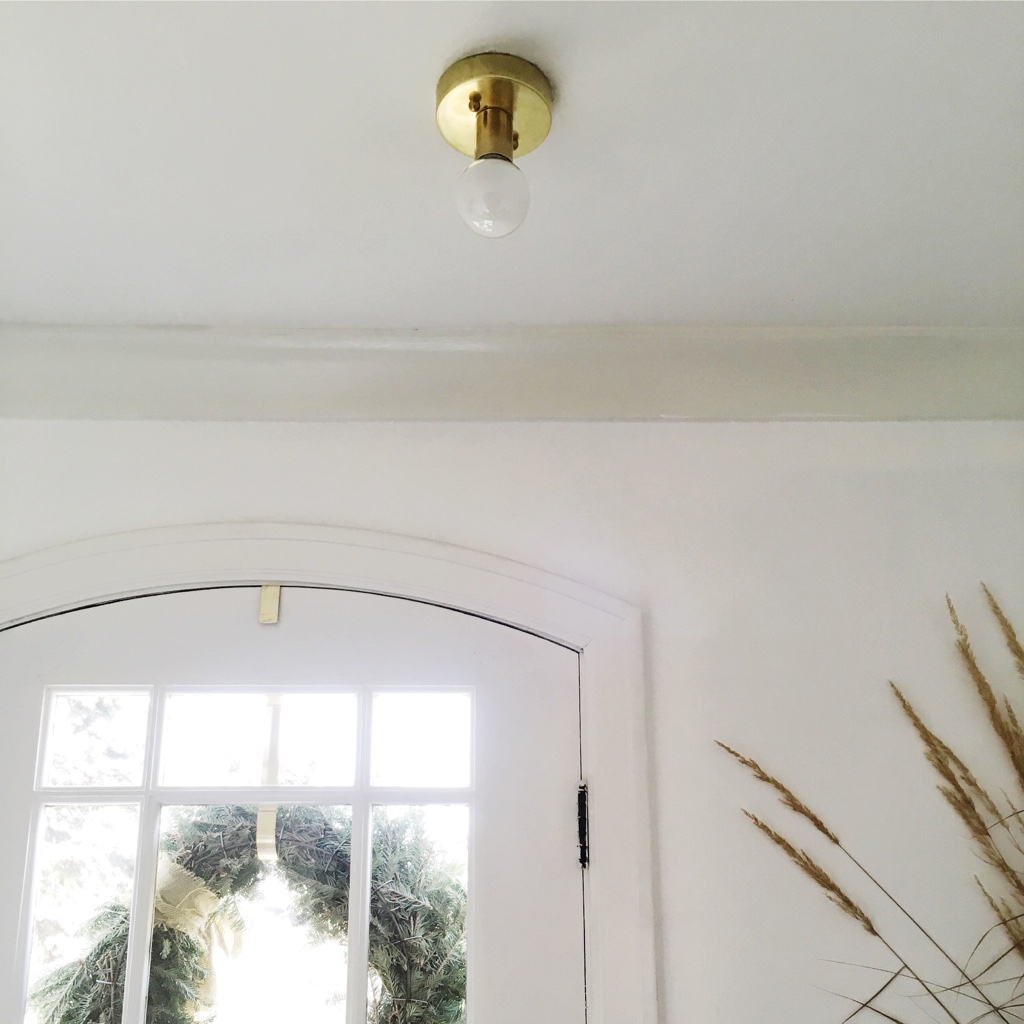
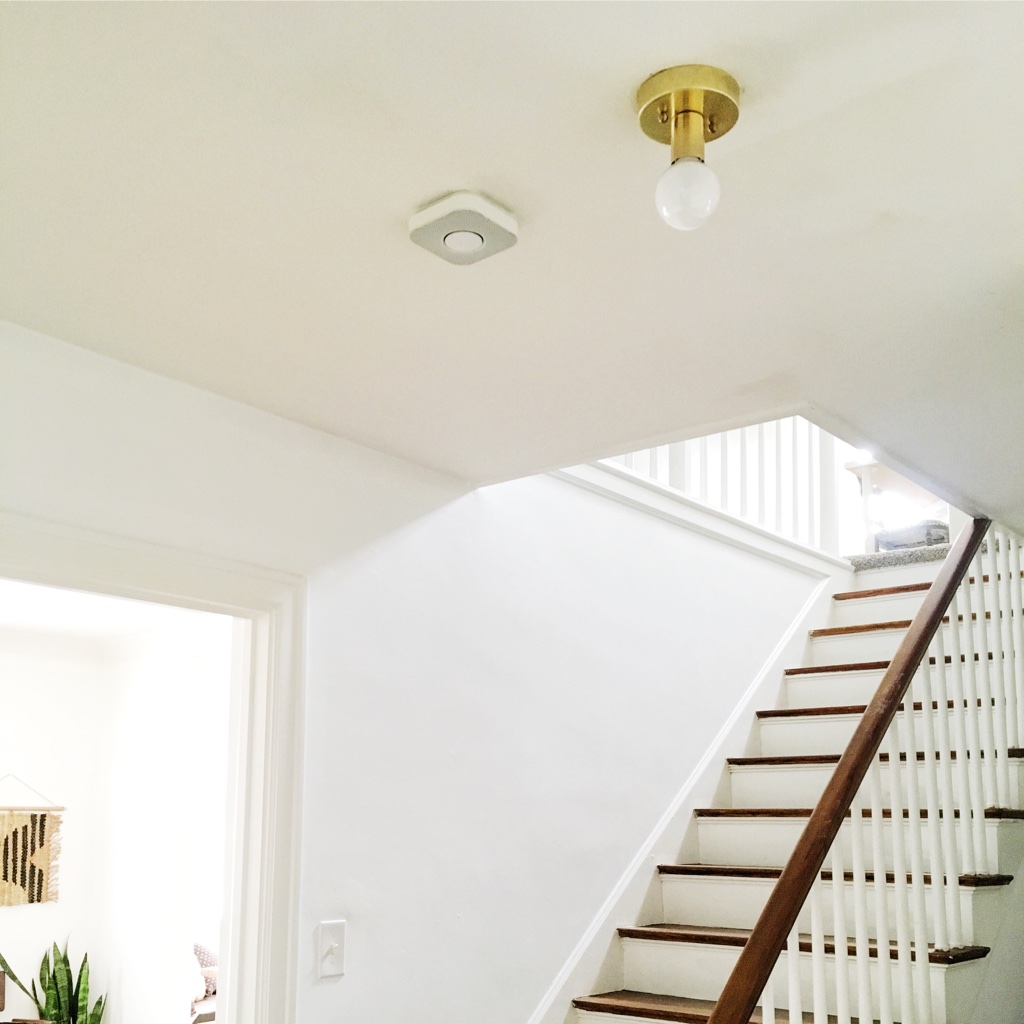
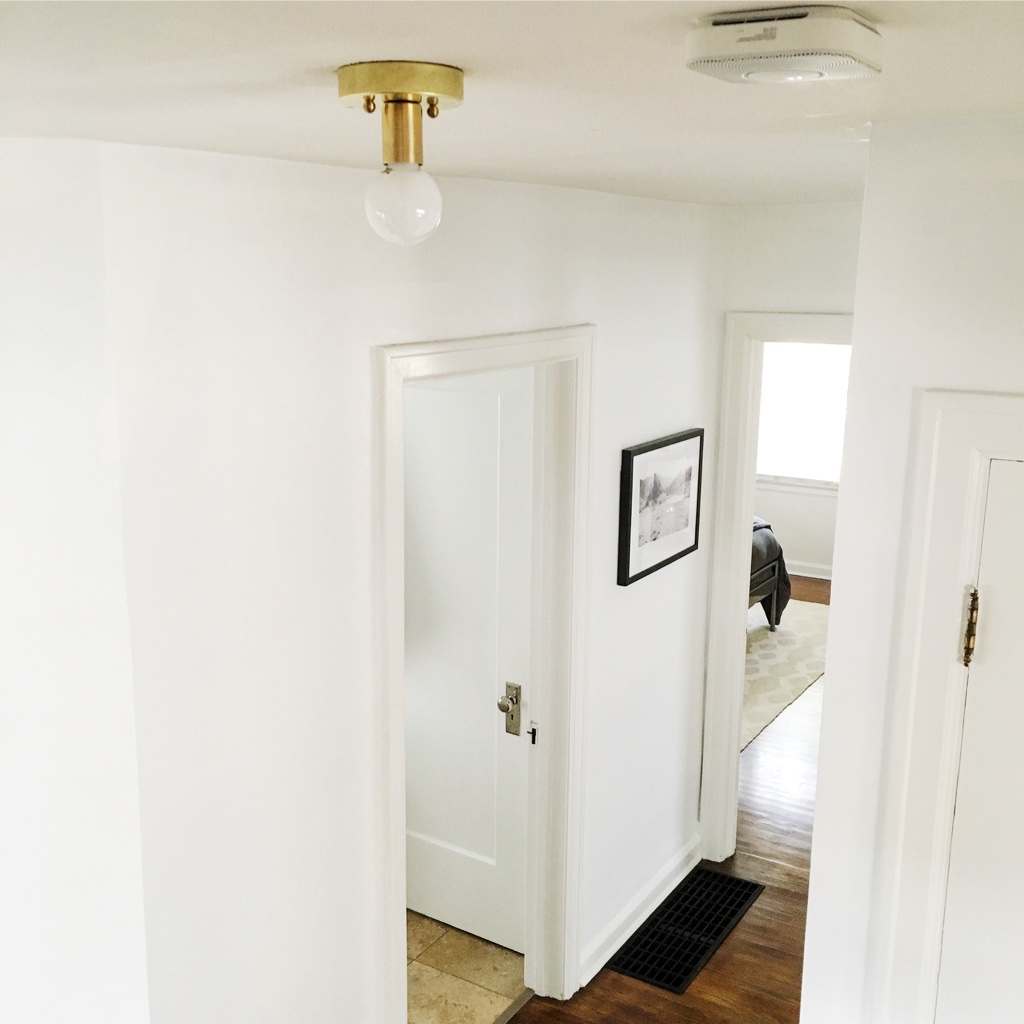
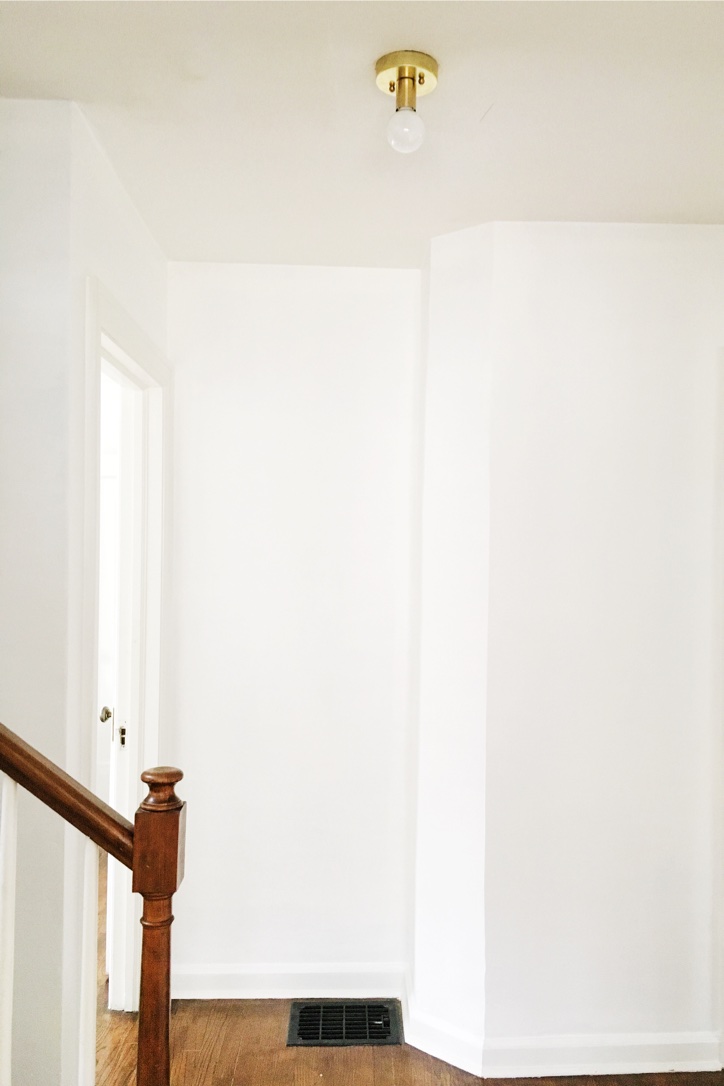
My latest quest for new lights has been for a surface mount fixture in our entryway and hallway. I wanted something extremely simple and, of course, affordable. I spotted the Fjord Surface and Cylinder lights during my search and knew I could create something similar for a fraction of the $120 price tag.
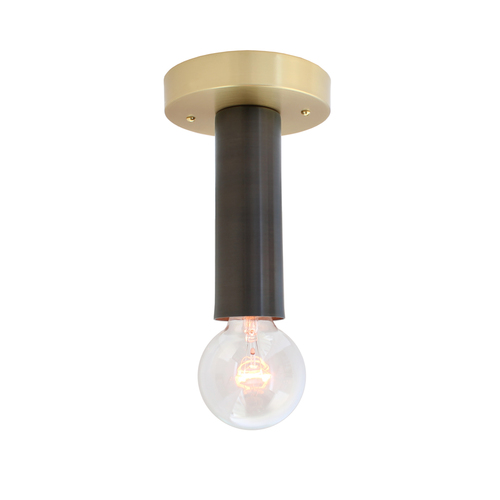
Fjord Surface by Cedar & Moss - $119
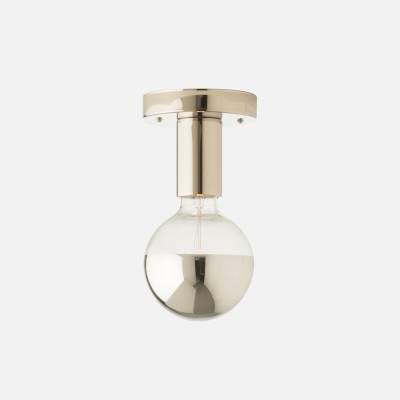
Cylinder by Schoolhouse Electric - $119
I headed straight to Grand Brass in search of some supplies. Now I must admit, finding the correct supplies and ensuring you order is exactly what you need is a PAIN. Tyler and I spend hours before each order going over every last detail and we STILL forget pieces and parts. Luckily, we've stockpiled quite the supply at this point so we can usually figure out a solution, but I wanted to spell it out clearly for all of you to create your own fixture without the headache. You're welcome. :)
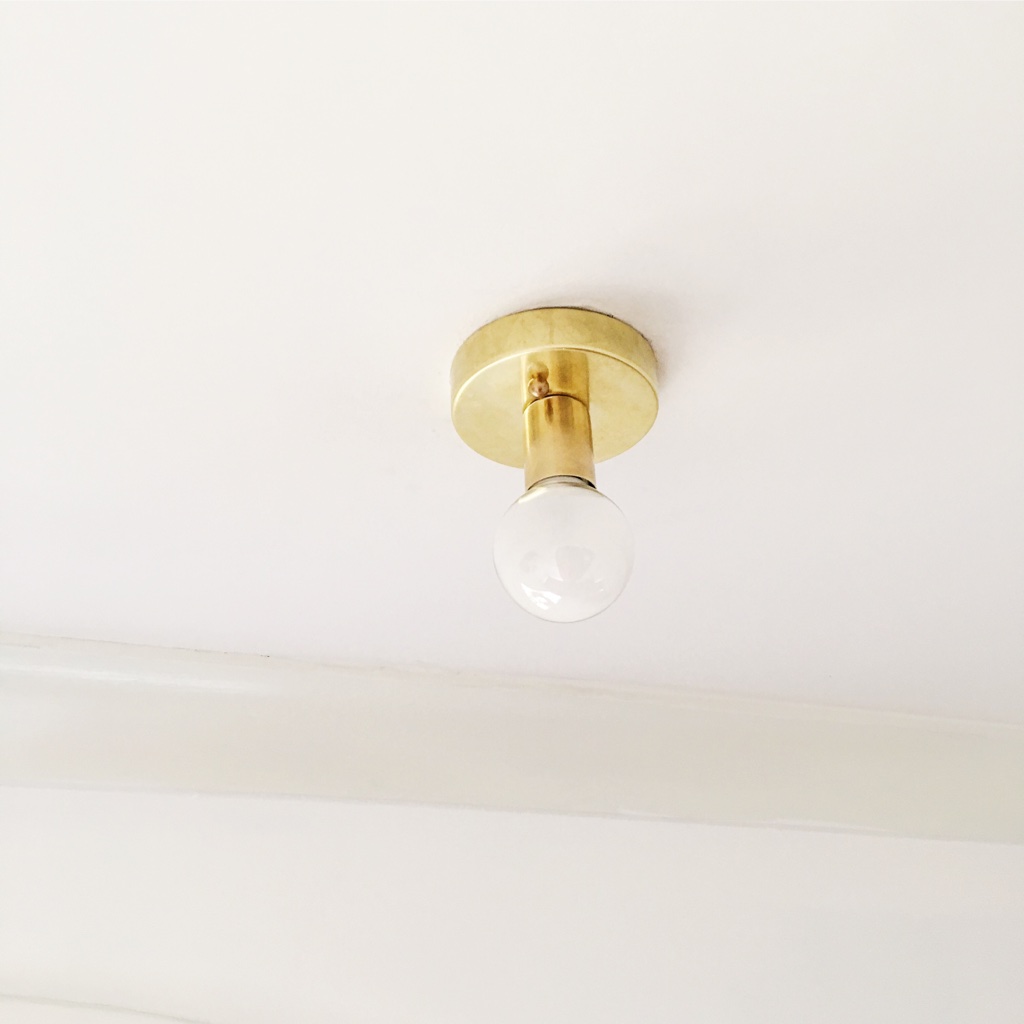
For this light DIY, I wanted to stick with a brass finish as we have stayed consistent with that pallete throughout the house. You could very easily switch out the brass supplies below for a silver, black, or other finish if you wish. I also wanted a very simple bulb yet something that would provide plenty of light for our space. Here's what we came up with...
s u p p l i e s
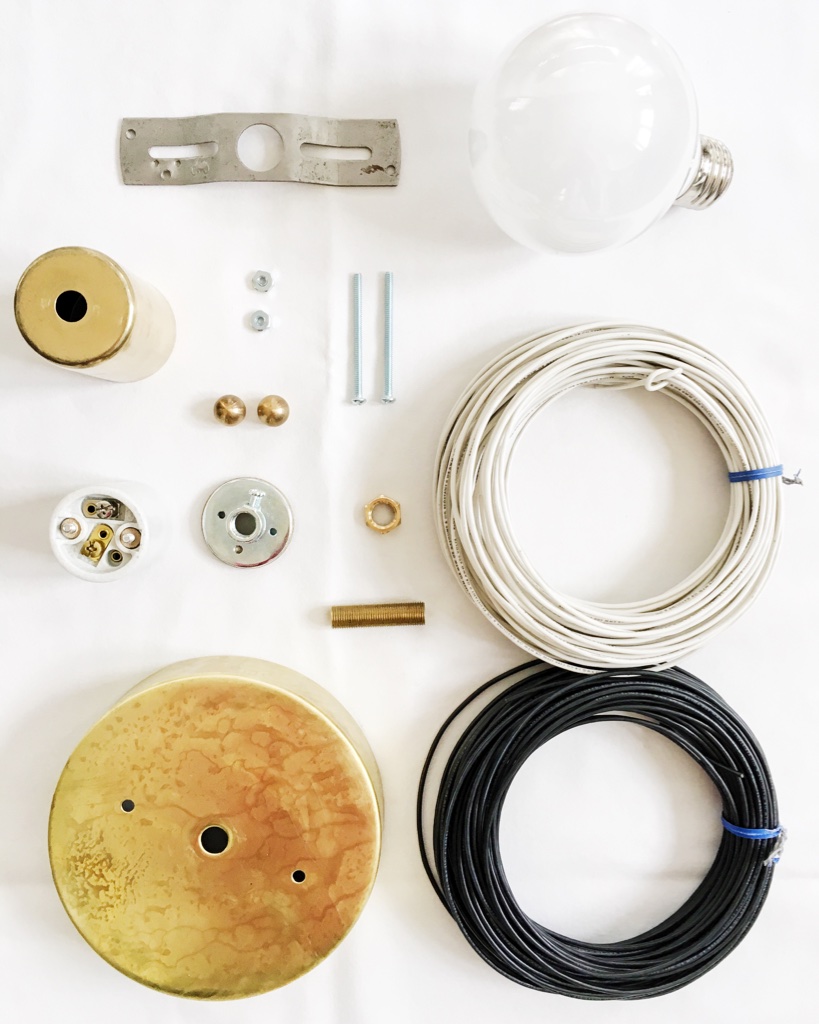
- (1) Unfinished brass canopy with 1/8ips center hole and mounting barholes - $12.40
- (2) 3/8in. unfinished brass balls - $0.25 each
- (1) 60 watt soft white eco halogen - $3.00
- (1) Unfinished brass socket cup - $3.85
- (1) White porcelain key less socket - $1.60
- (1) 1-1/2in. threaded hollow brass nipple - $0.48
- (1) Hexagon nut - $0.16
- (1) 4in. steel crossbar with 8/32 tapped ground hole - $0.50
- (2) 6/32 x 1-1/2in. machine bolt round combo with nuts - $0.98/pack of 8
- (2ft) white wire - $0.30/ft
- (2ft) black wire - $0.30/ft
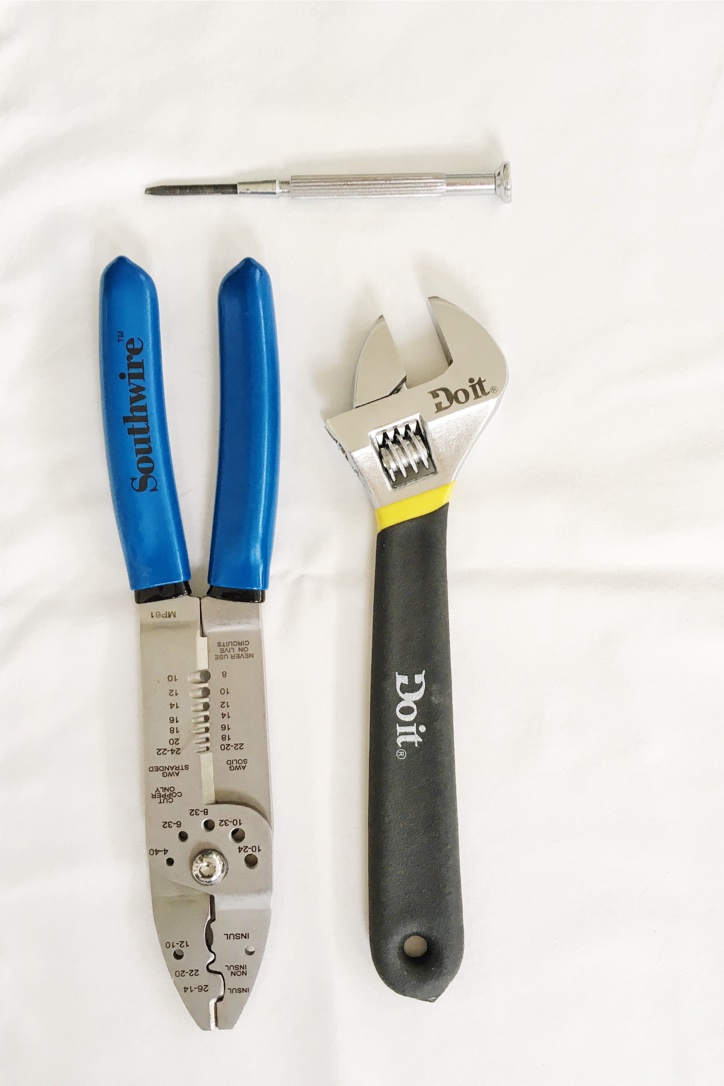
- Electrical tape (not pictured)
- Wire cutters (not pictured)
- Screw driver (not pictured)
- Wrench (not pictured)
TOTAL: $24.67 + shipping/tax
i n s t r u c t i o n s
The first step is to gather all of your supplies and tools. You will want to make sure you have everything on hand before beginning the project to keep things moving along smoothly.
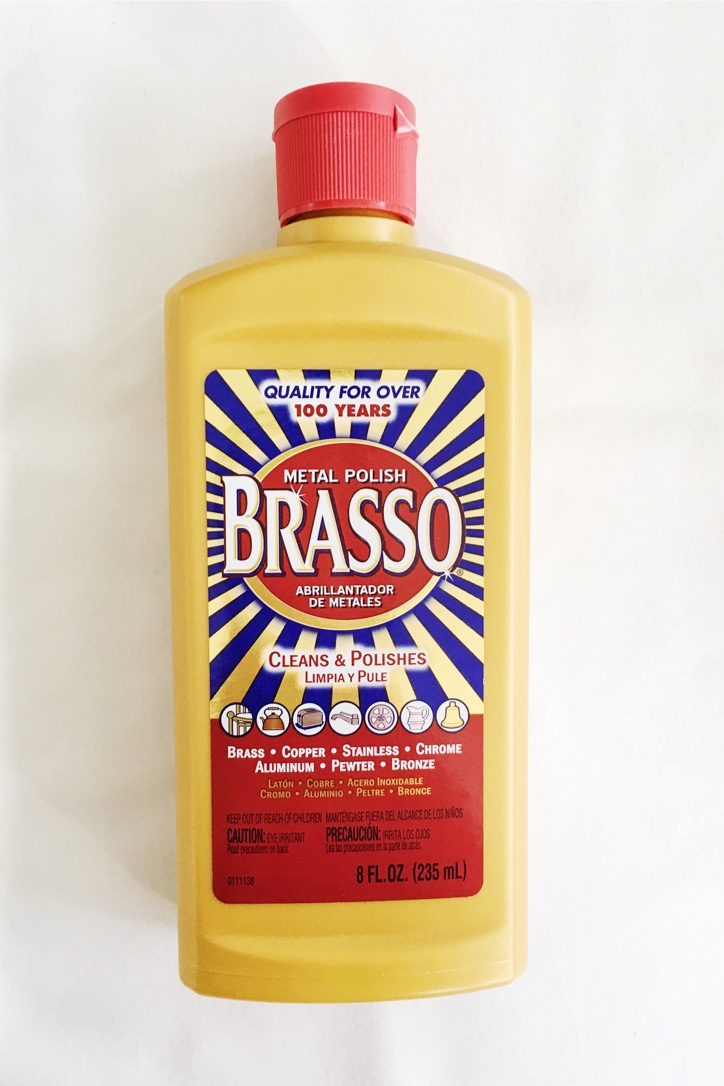
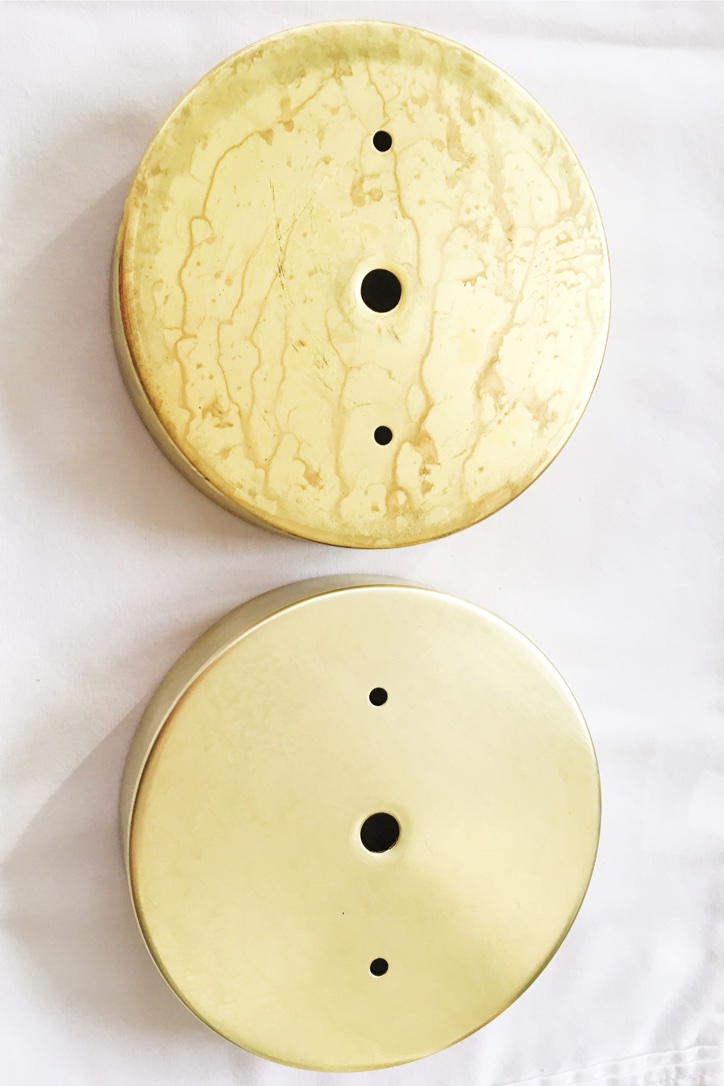
The next step is to clean all of your unfinished brass parts. This is an optional step, but I find it makes things a lot less messy if you clean the pieces from the beginning. I used Brasso and some old rags to remove the tarnish from our pieces. Please note, however, that unfinished brass is meant to develop a patina over time. It truly does get better with age. It's nice to begin with a clean slate but know that the finish will continue to change.
Here's a little before and after...
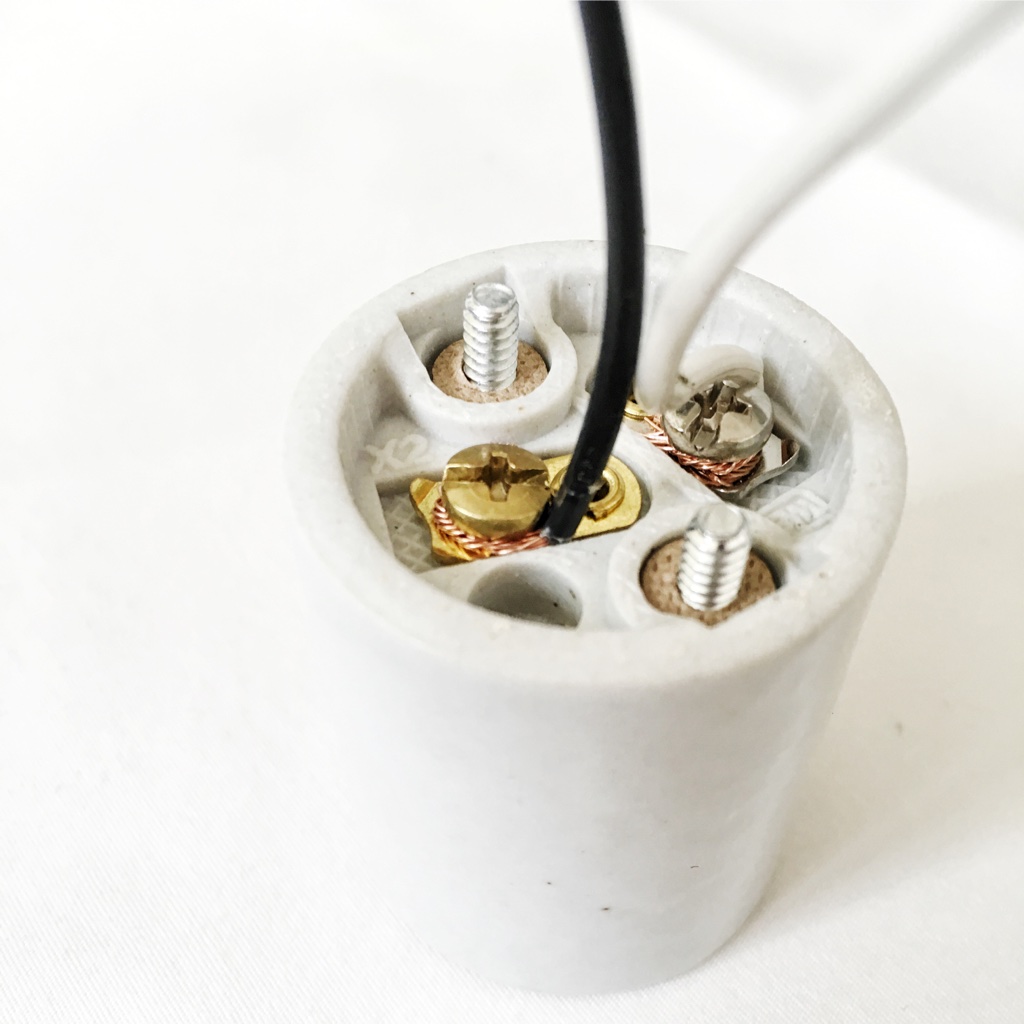
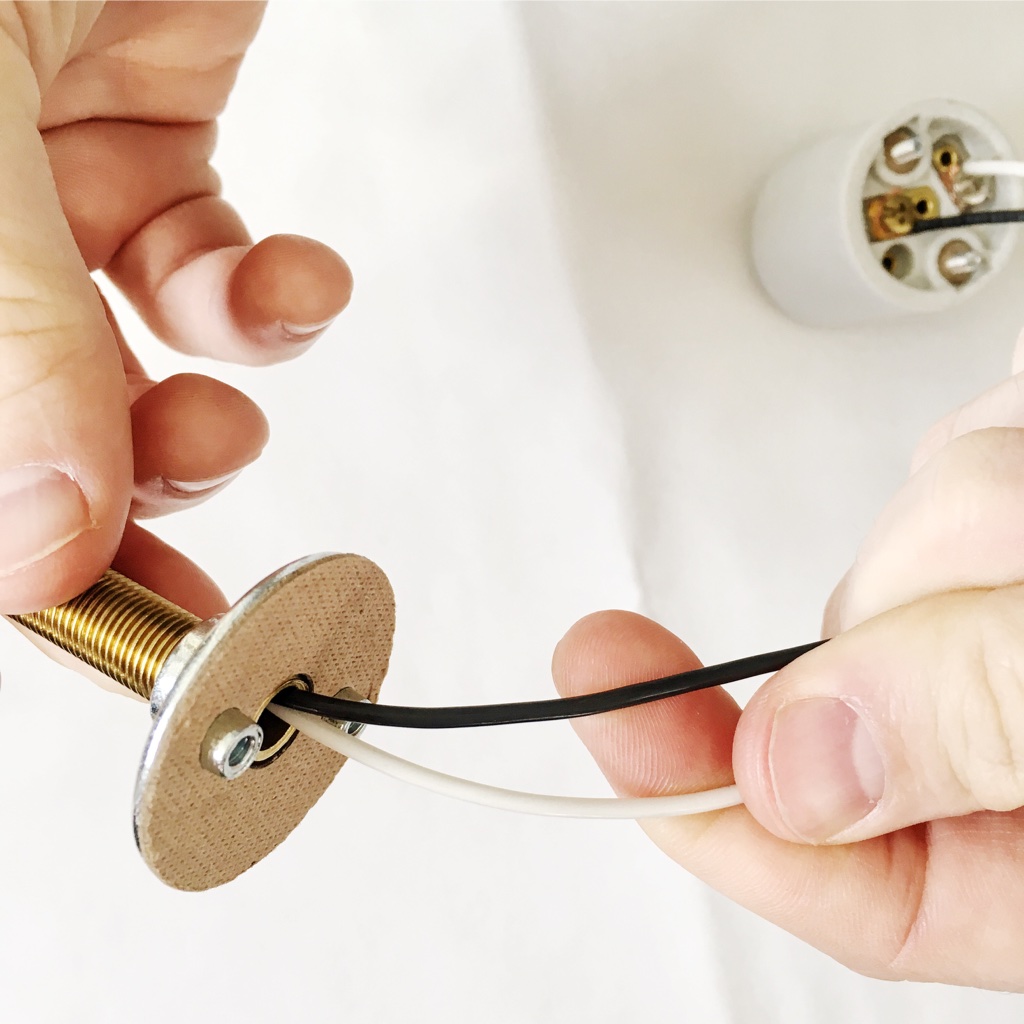
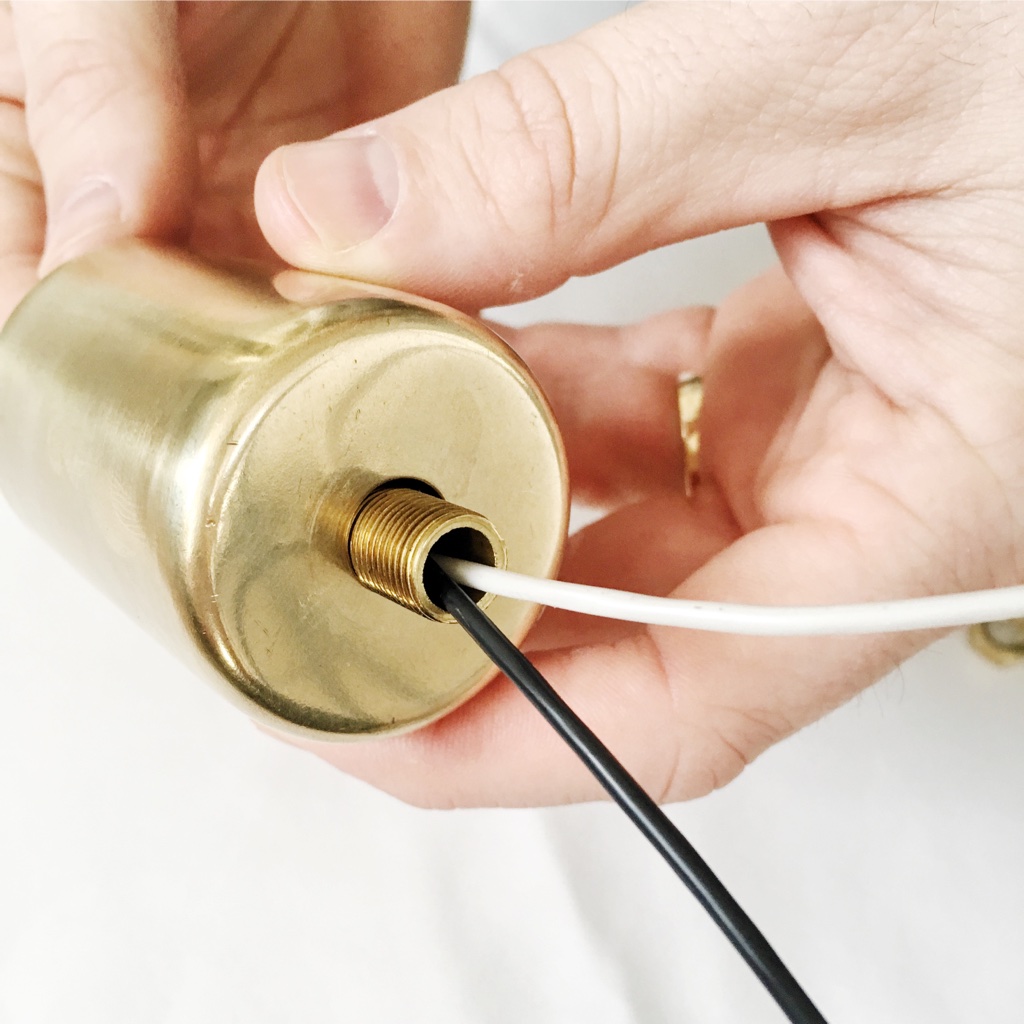
Now that everything is cleaned and polished, let's start wiring. Grab your white and black wire and attach each to your white porcelain socket. You will need to use your wire strippers to remove ~1in. of the wire cover on one end to expose the wire underneath. Wrap these exposed wires around their respective screws. Remember: white --> silver ; black --> gold. Secure tightly using screwdriver.
The next step is to grab the white porcelain socket top and screw the hollow threaded nipple into it. Be sure to tighten the screw for a snug fit. 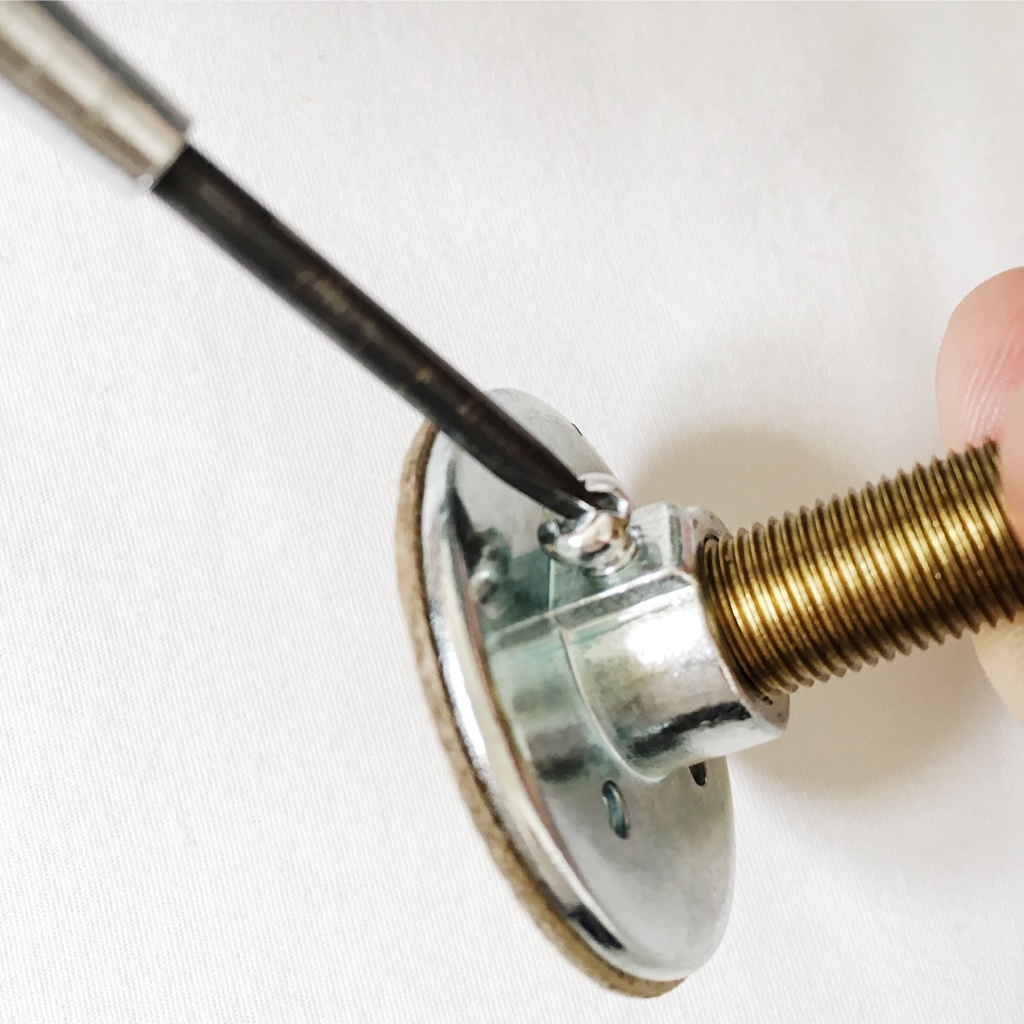
It should look like this:
Next, thread the wires you attached to your socket through the end of the hollow threaded nipple.
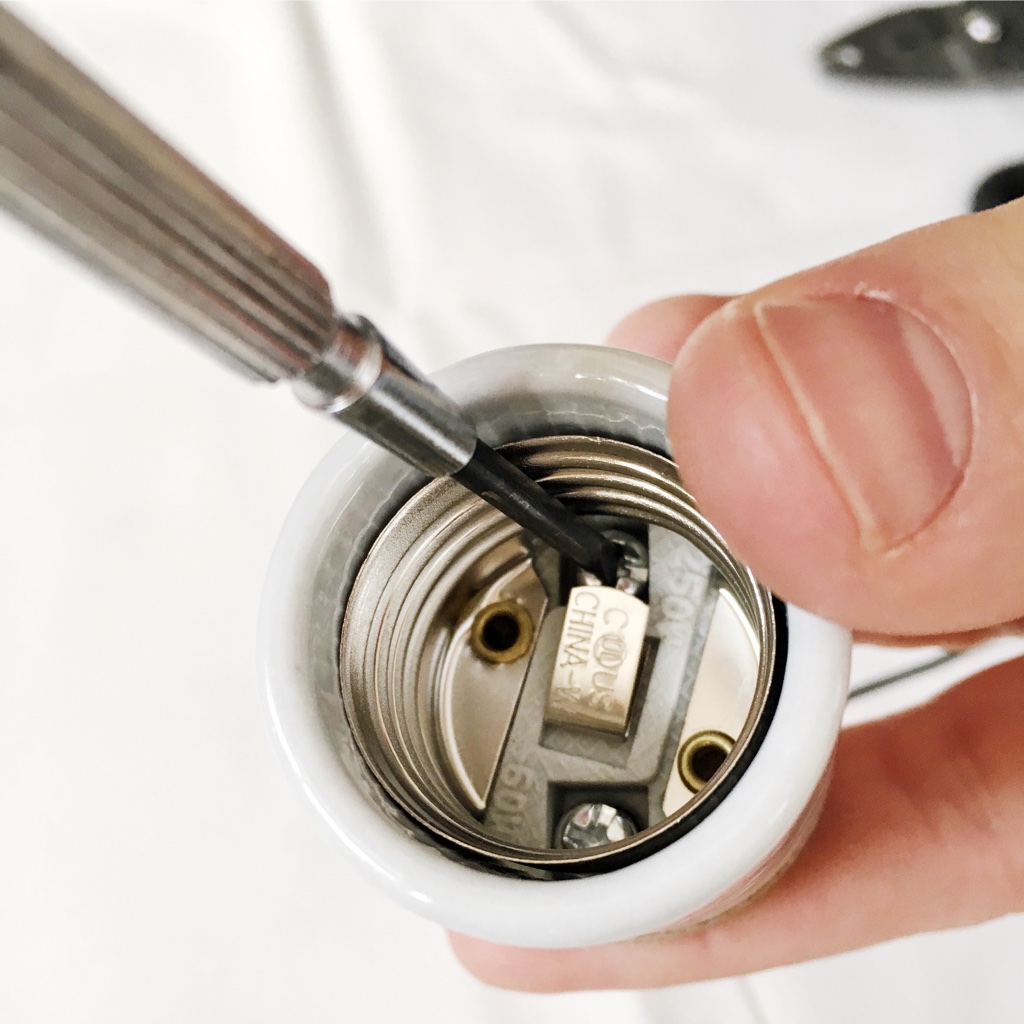
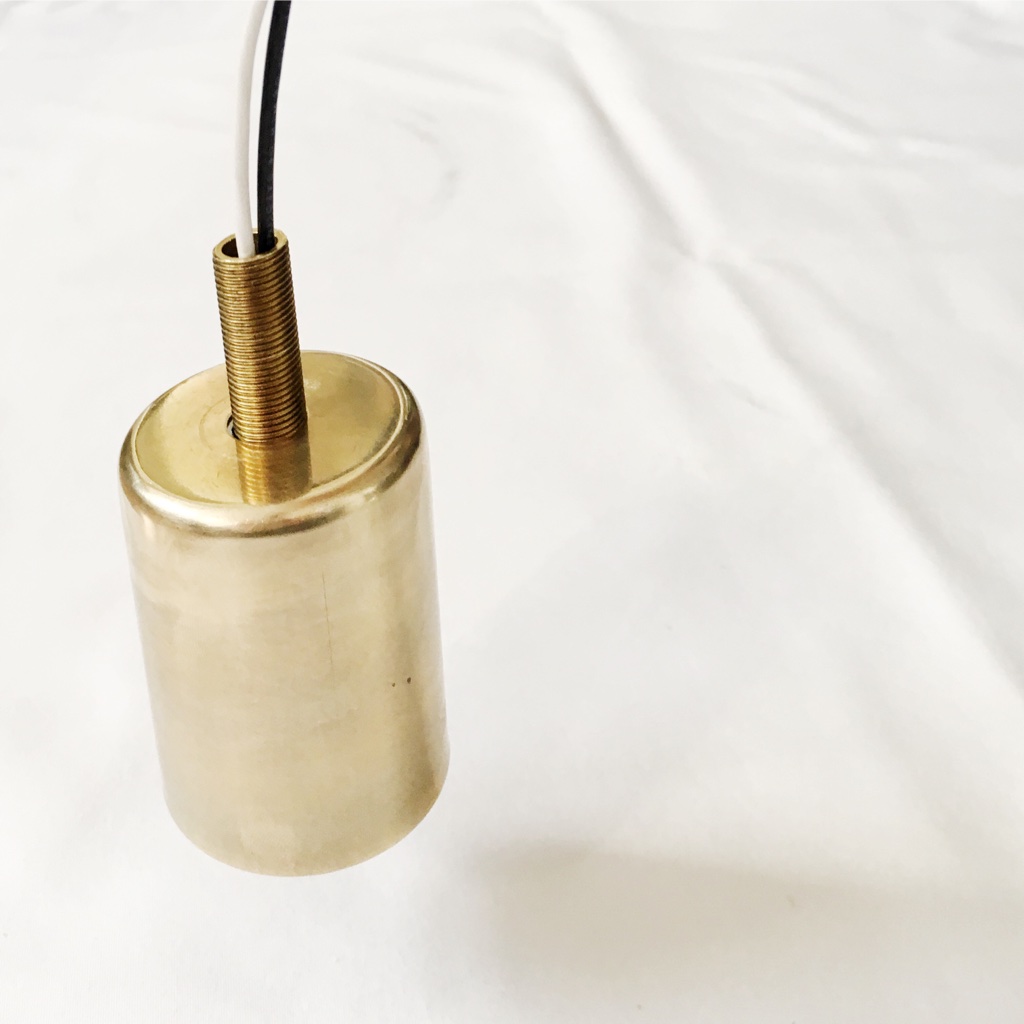
Then line up the screws of the white socket to the holes of the socket top.

Once lined up, flip the white socket over and tighten the screws with a screwdriver.
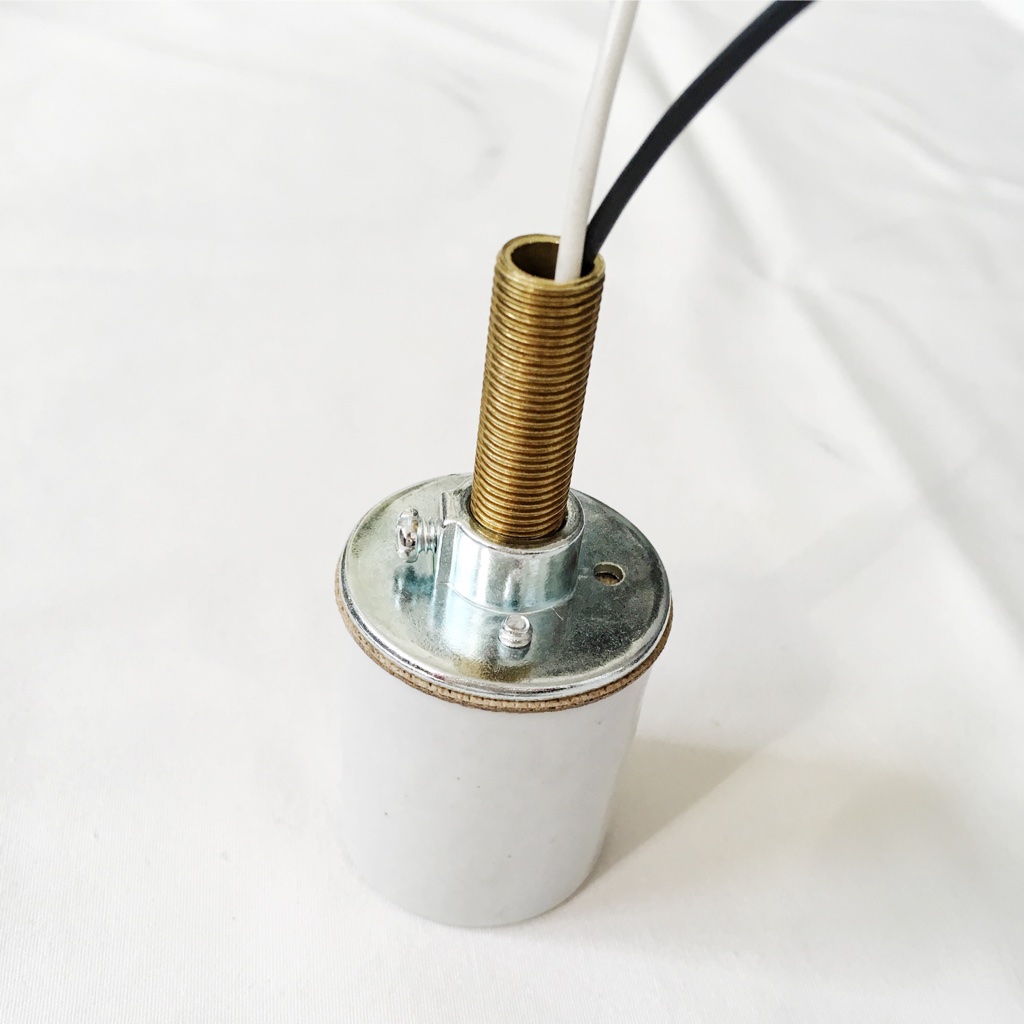
You should end up with one solid piece that looks like this...
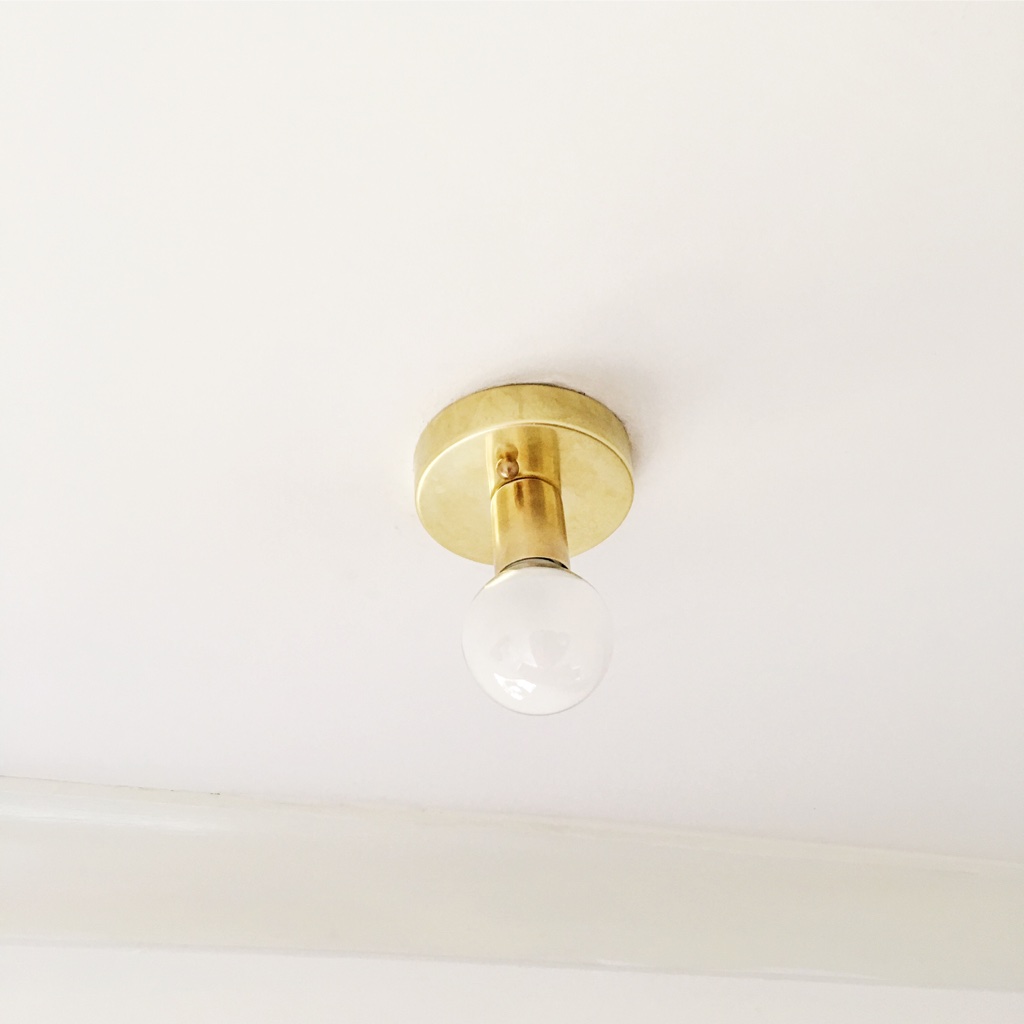
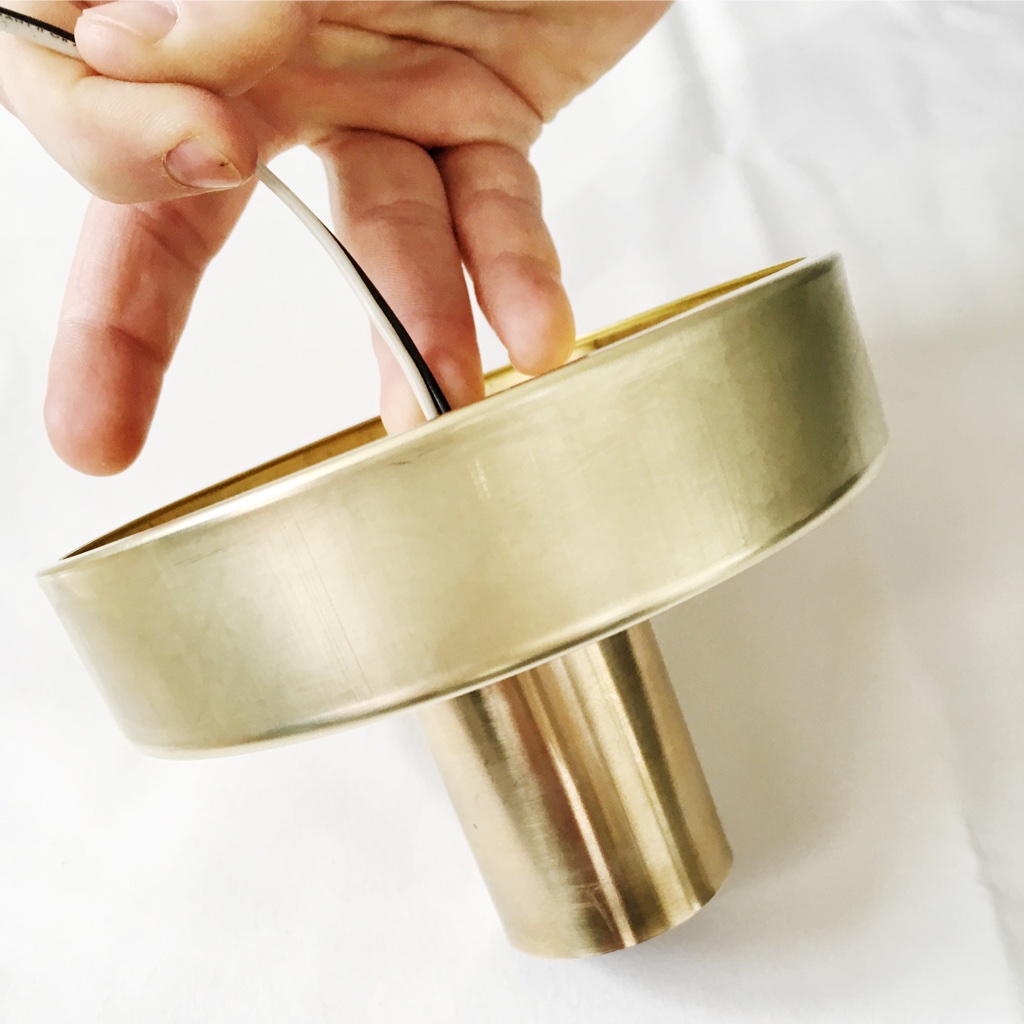
The next step is to fit your brass cup over the white socket. We want a clean finish for this light, so the cup will cover up all of the internal wiring we just completed.
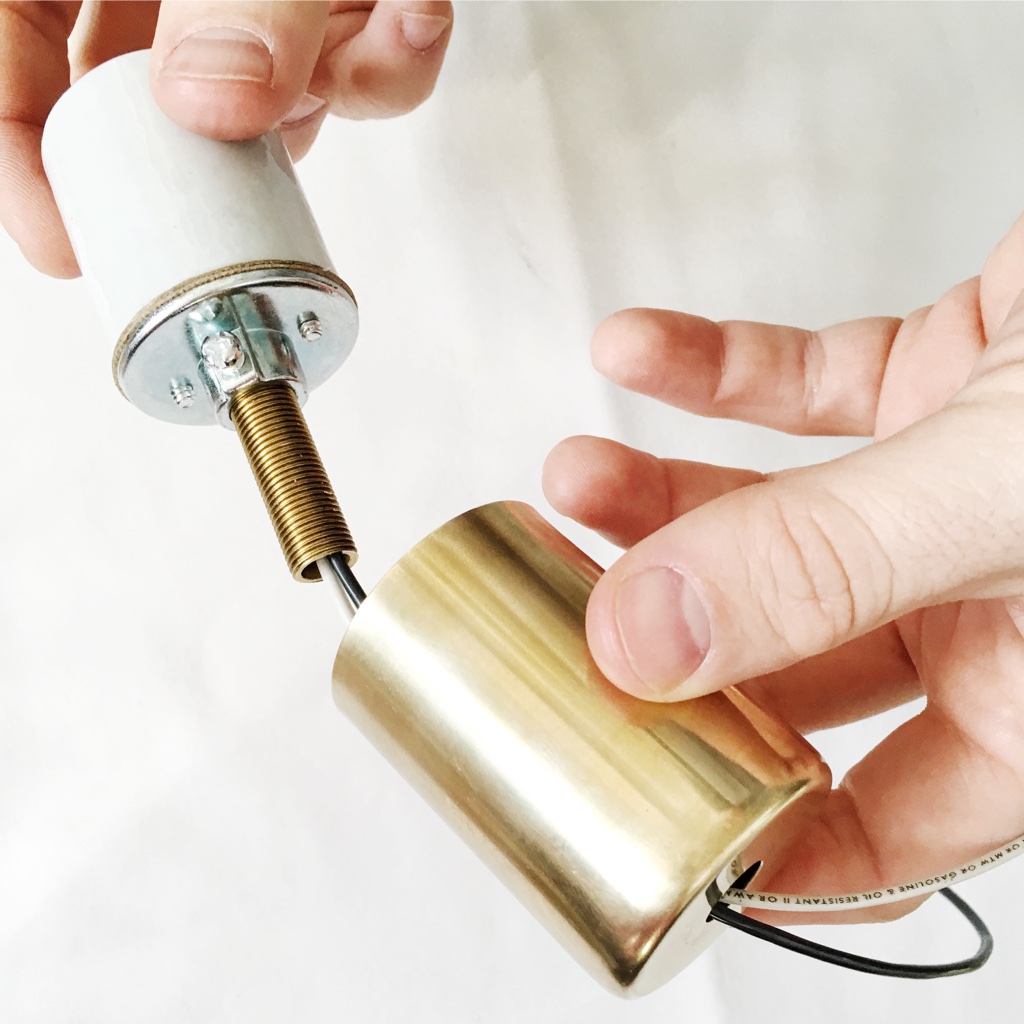
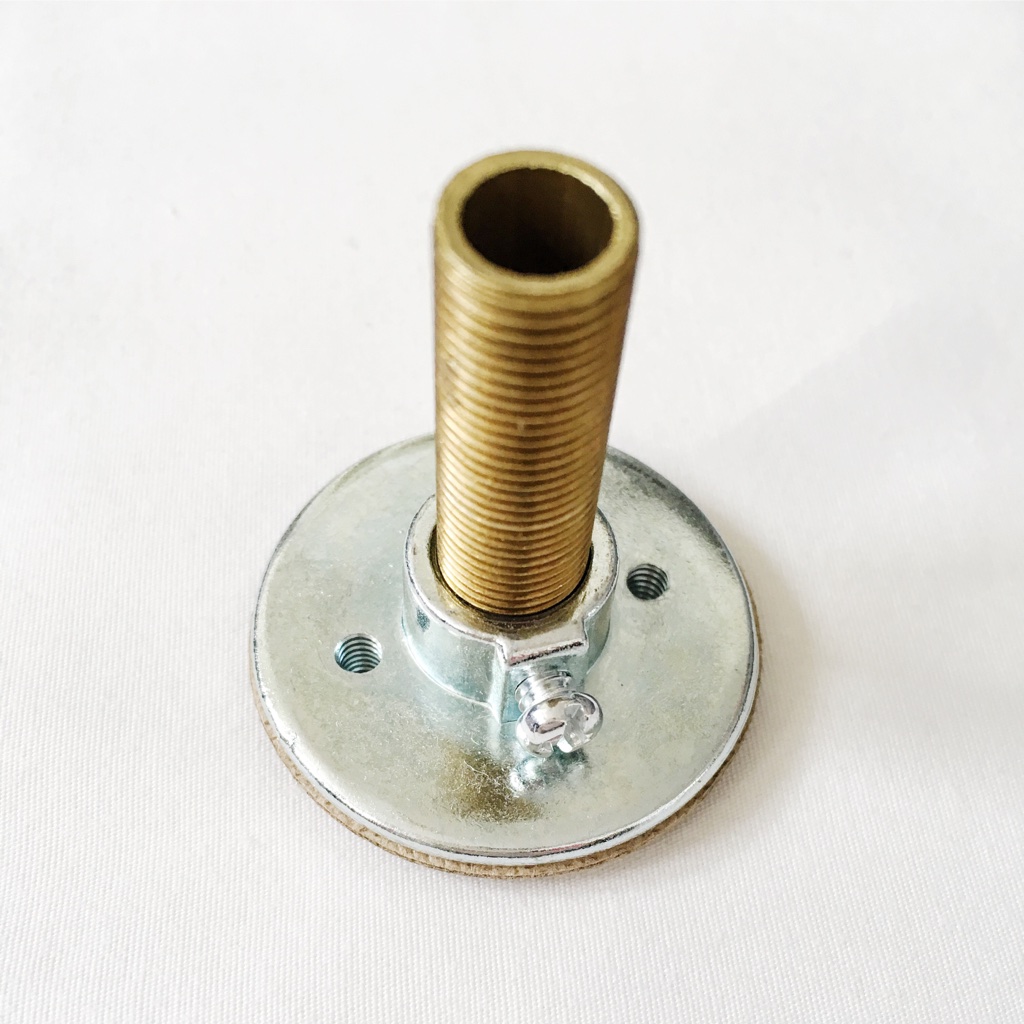
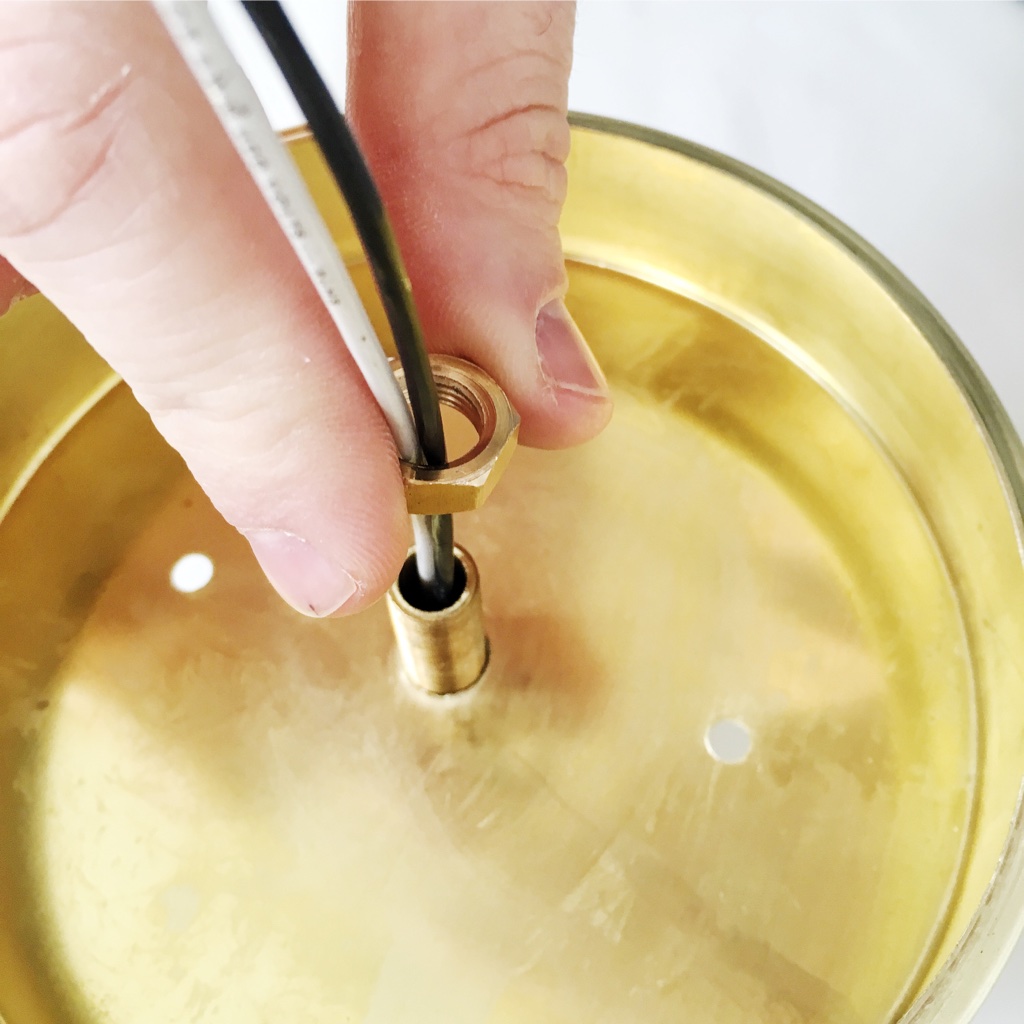
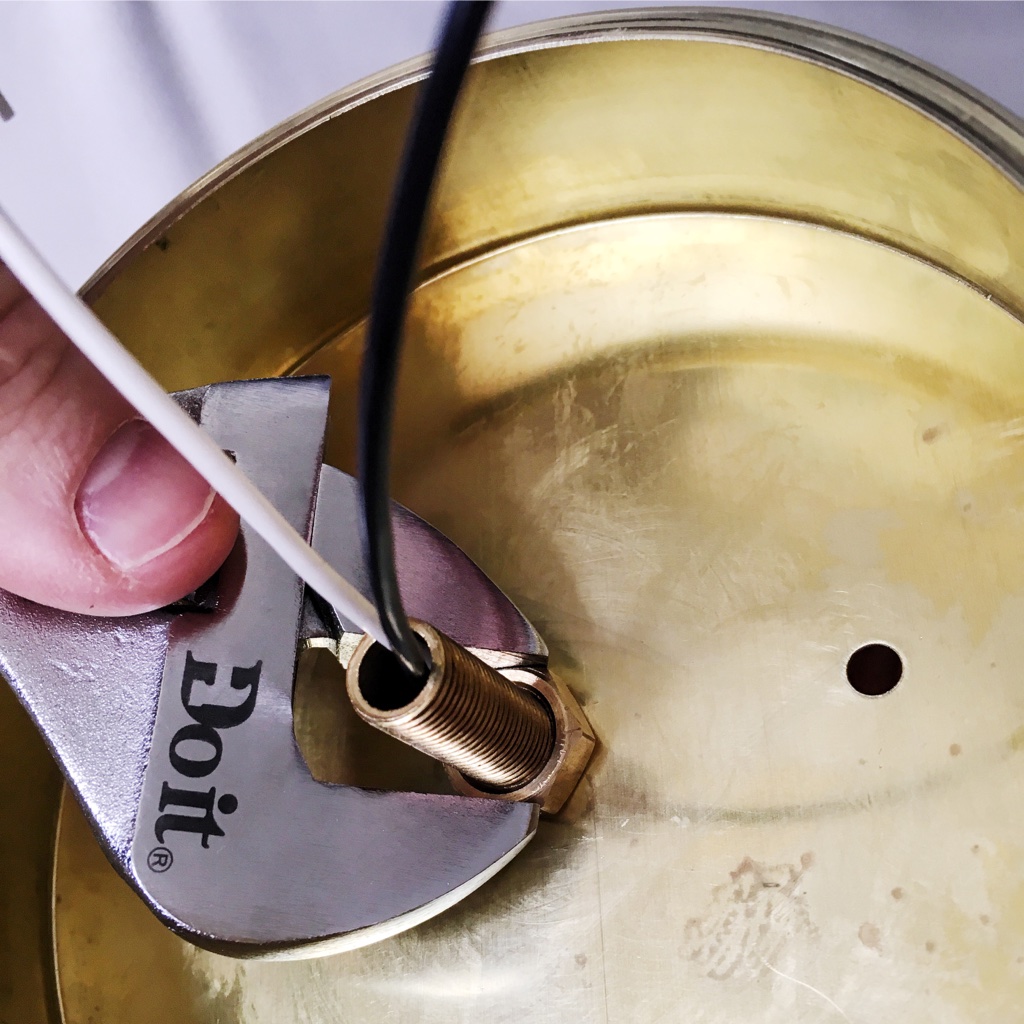
Now we need to attach this piece to our brass canopy. Feed the wires and nipple through the middle hole of the canopy.
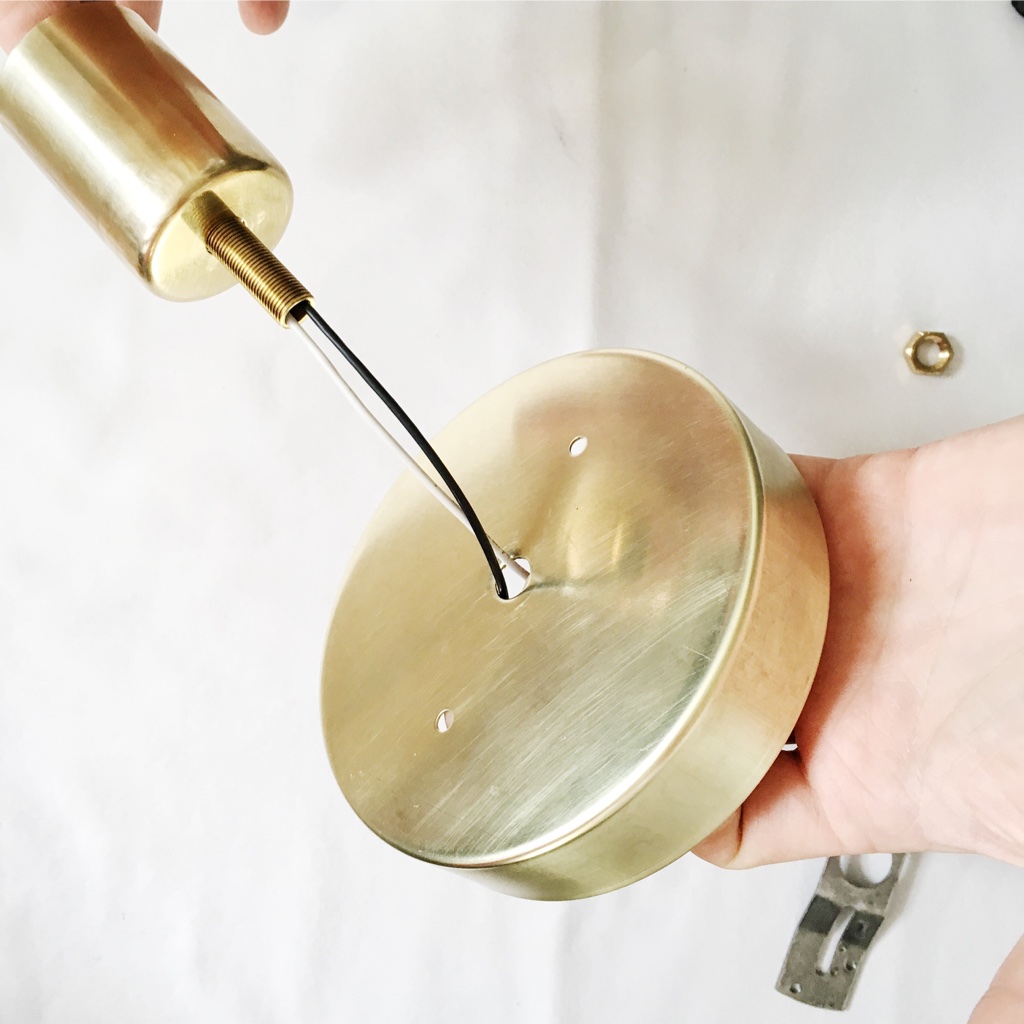
The final step is to secure the cup to the canopy by using your hexagon nut. Make sure to tighten with a wrench to ensure a secure fixture.
At this point, the fixture is ready to be installed!
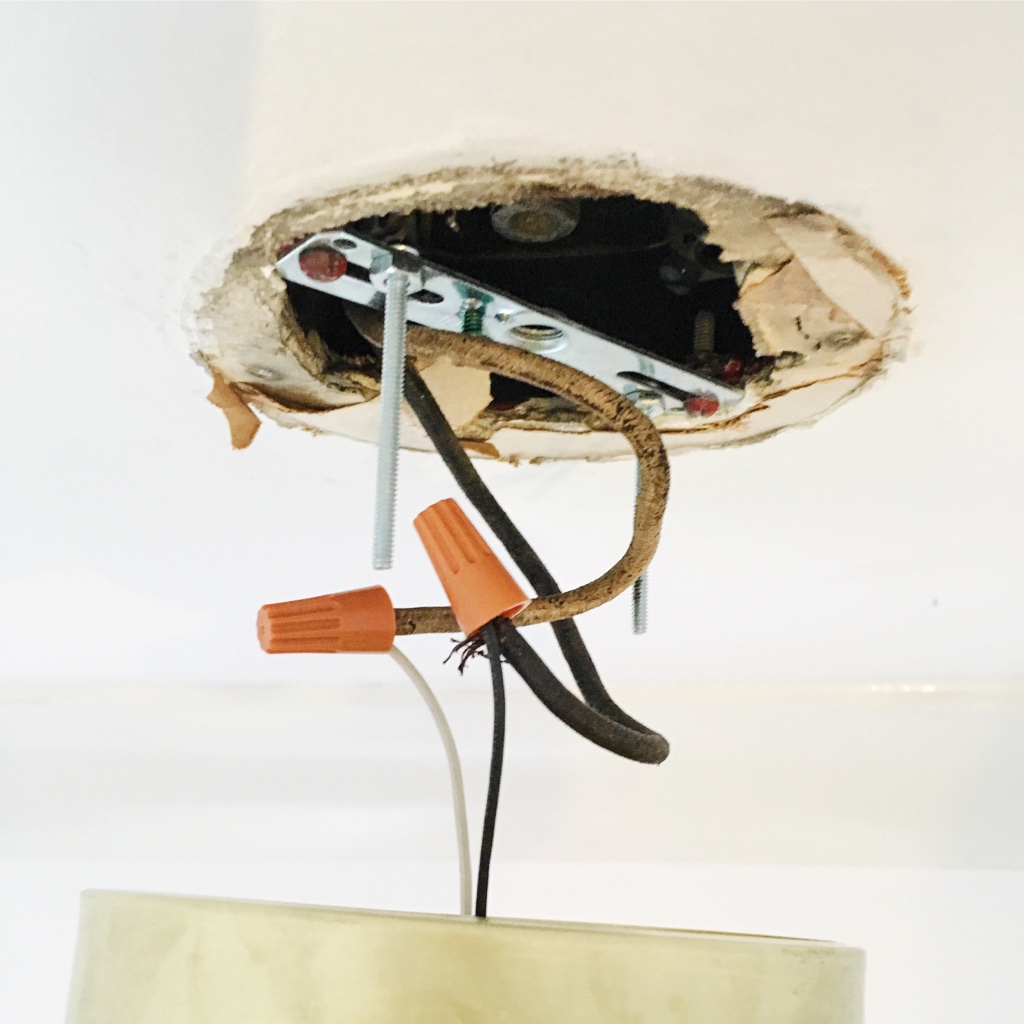
PLEASE NOTE: All electricity should be OFF before proceeding. If you are not comfortable with electrical work, please hire a professional.
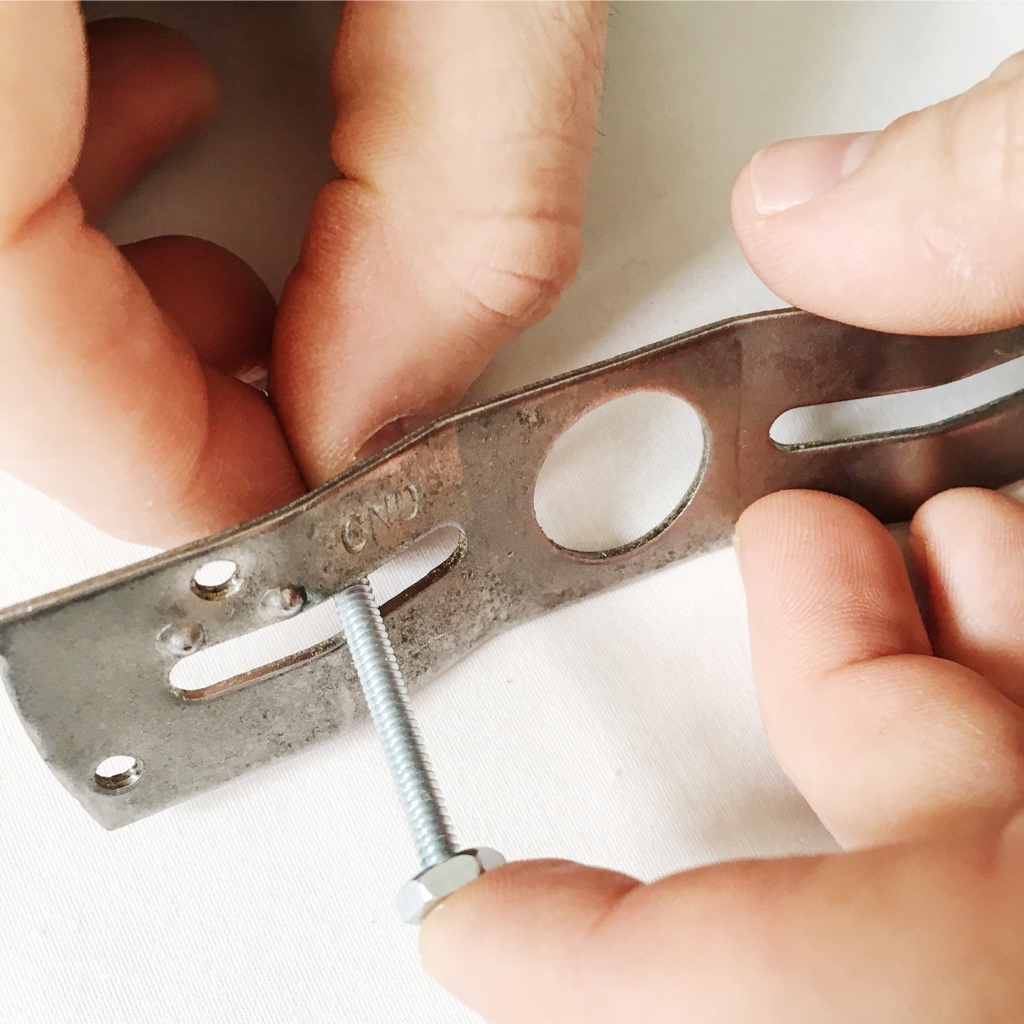
Also, some of you may already have a steel crossbar in place from your previous light fixture. We did not so we had to mount the crossbar first. Be sure to use a crossbar with a hole in the middle large enough to accommodate your threaded hollow nipple and holes on the left and right that will accommodate your 1-1/2in. machine bolts. Secure these bolts using the provided nuts.
To install the fixture, remove ~1in. of wire cover from both the black and white wires - just like we did at the beginning. Attach your white wire to the white wire in the ceiling. Secure using electrical tape and wire connectors. Repeat for the black wires.
Once the wiring is finished, position the brass canopy so that the machine bolts fit through the canopy holes on the left and right. Next, screw your brass balls onto each bolt. The ball should fit snuggly against the canopy ensuring a tight fit with the ceiling. If your ball does not fit securely, you may need to use shorter or longer machine bolts.
Once the fixture is secured to the ceiling, the final steps are to screw in your lightbulb, turn on the power, and pat yourself on the back for a job well done!
I wanted a clean and simple fixture, and that's exactly what you get with this DIY. I love it! We actually made two... one for our entryway and another for our hallway. Both look great. I think it might be fun to change-up the lightbulbs over time, too. You could try a large 5in. globe or one of the gold capped bulbs. You may even try a fun Edison bulb if you don't require a ton of wattage. So many options!