Lighting DIY | Kitchen Nook Chandelier

The lighting DIYs continue! In case you missed it, feel free to check out the dining room, living room, kitchen, guest room, and hallway DIYs. But today, let's talk about the latest and greatest lighting DIY- the Kitchen Nook Chandelier!
I found a pendant light in the West Elm clearance section on a whim about three years ago, and we decided to hang it in our kitchen nook. I didn't love it, but I didn't hate it. Heck, anything had to be better than the previous fixture. Woof.
When we decided to order a bunch of pieces and parts from Grand Brass to make our hallway and bathroom lights, I thought we might as well do the same for the kitchen nook. Surely we could come up with something that looked better than the current fixture and didn't cost too much. I began searching far and wide for some inspiration and landed on three unique options.
"City Chandelier 3" by Schoolhouse Electric - $154
"Spectra" by Cedar & Moss - $159

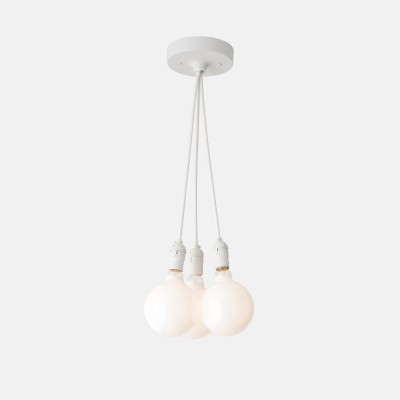
"Cluster Glass Pendant" by West Elm - $249
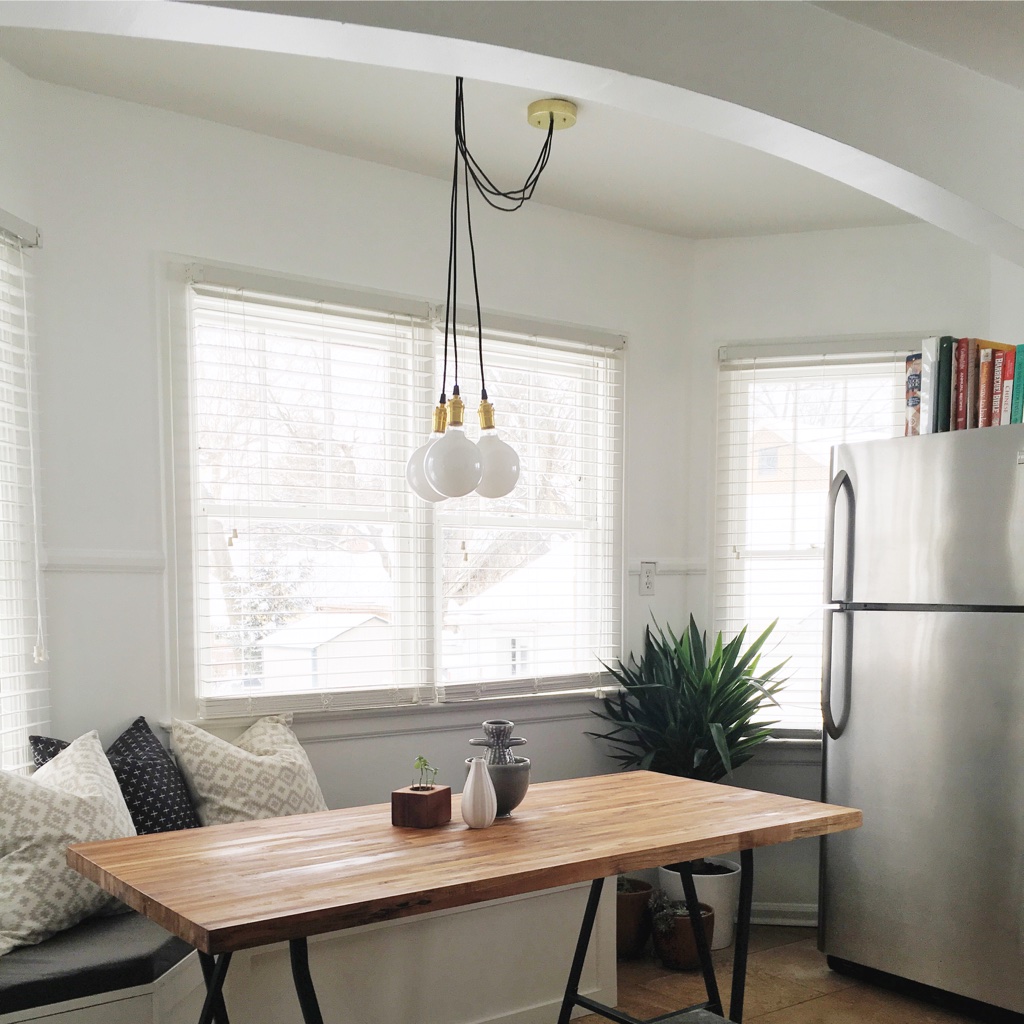
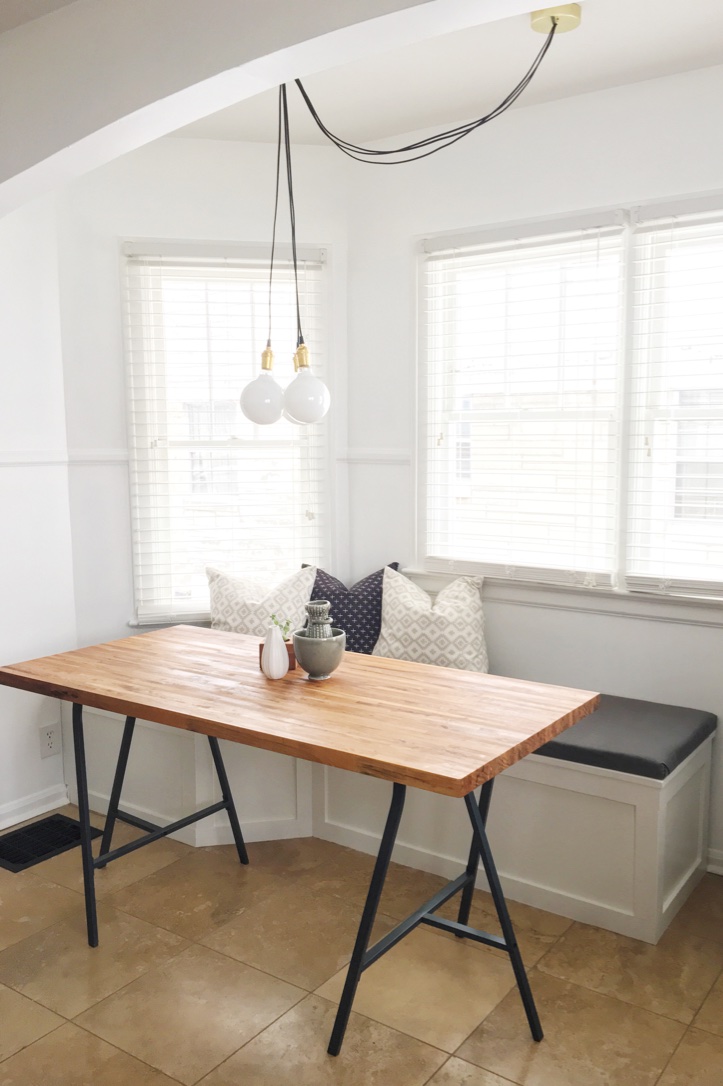
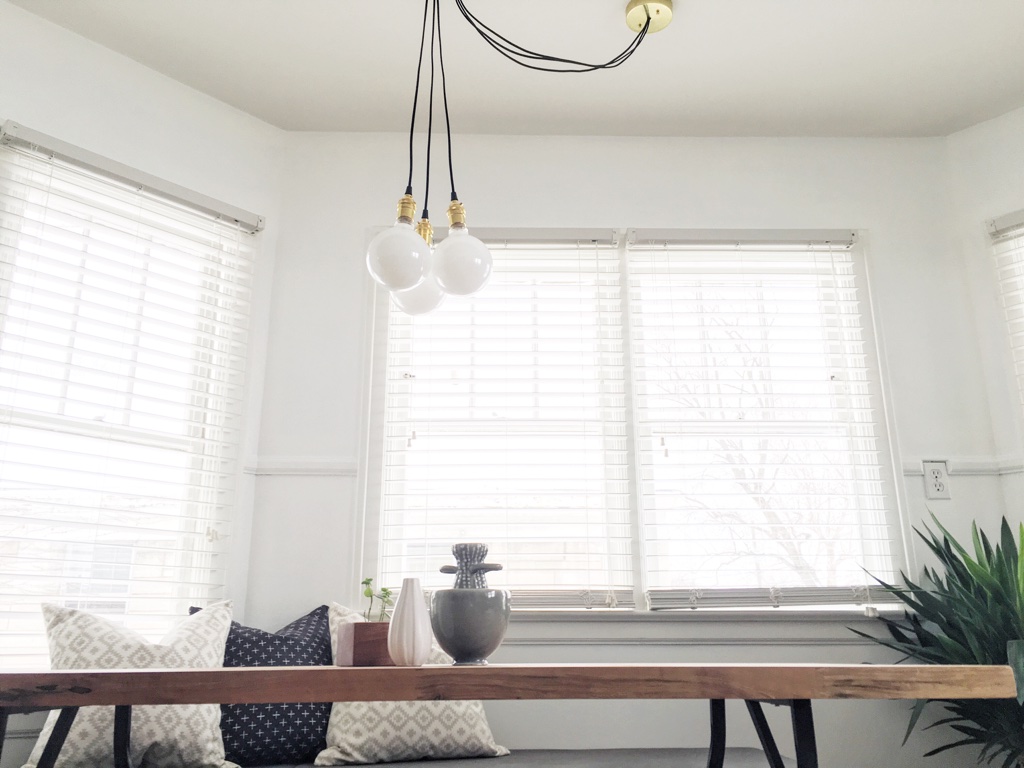
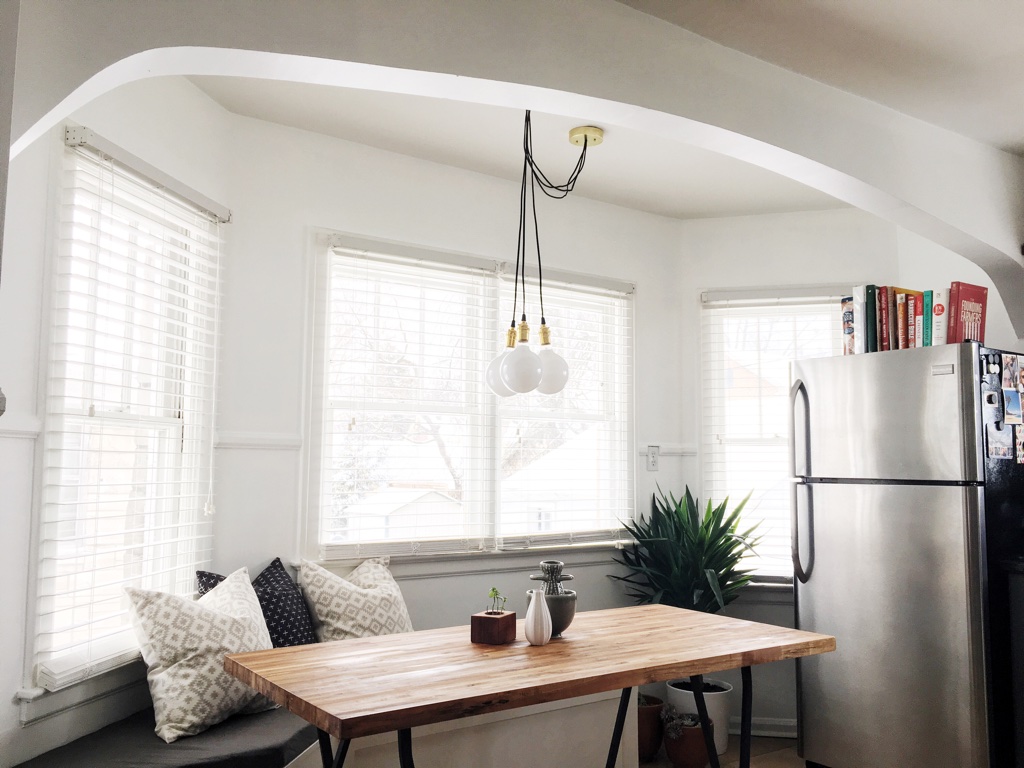
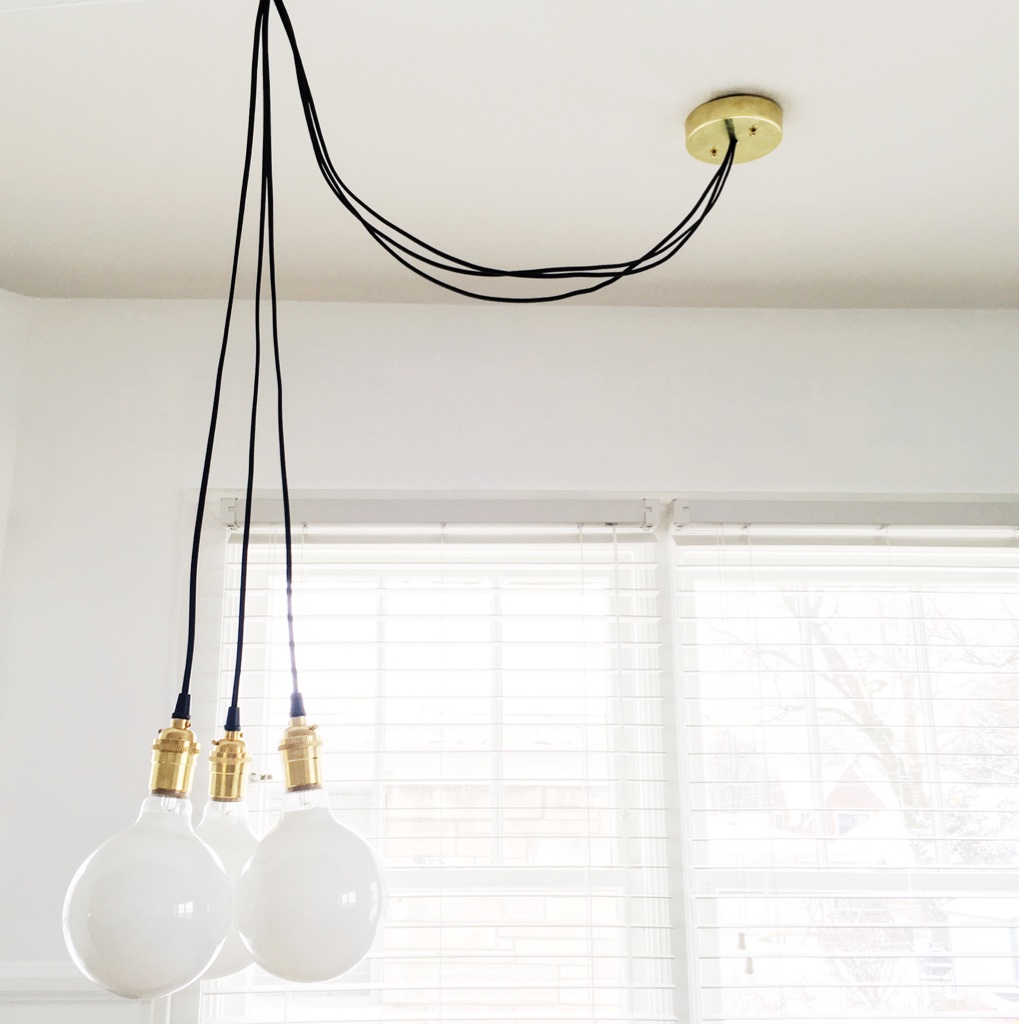
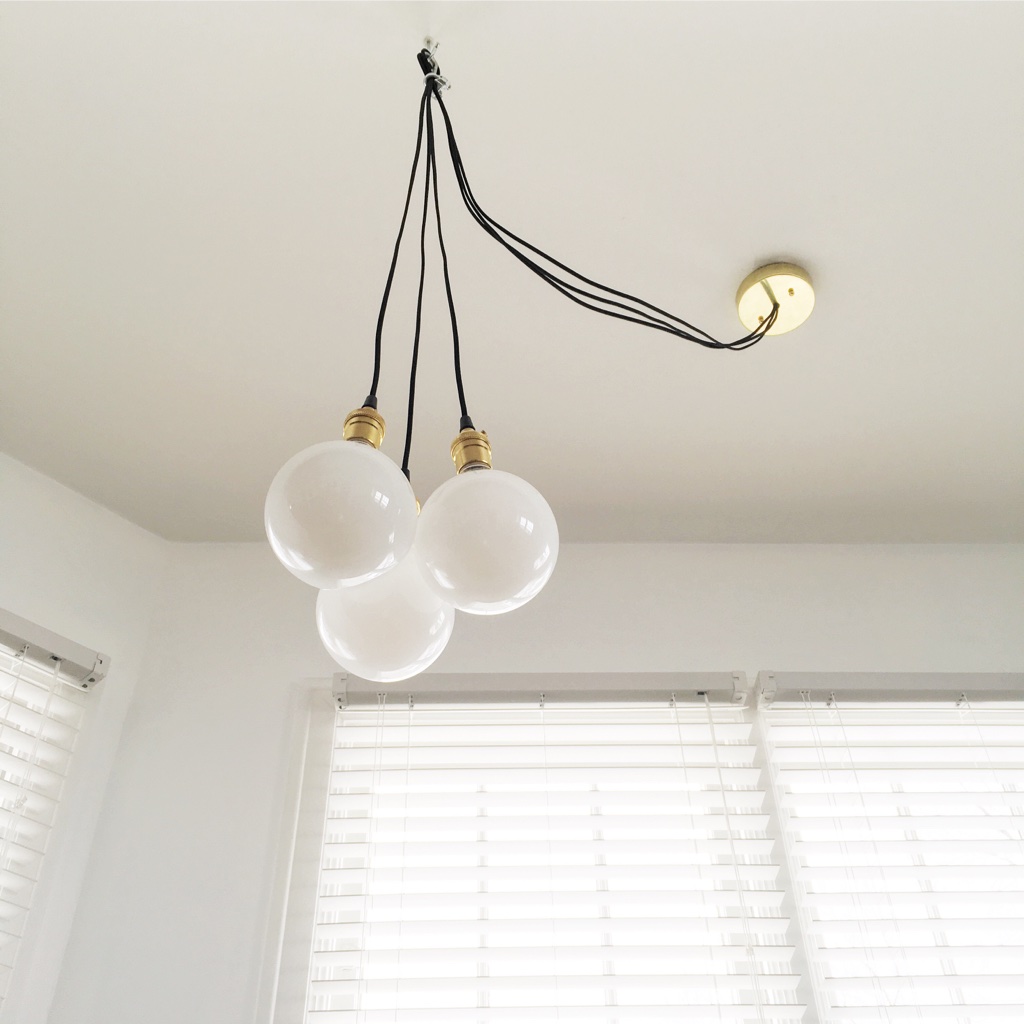
I liked all three of these because they featured multiple bulbs. Our current light was a single bulb, so anything brighter would be a plus. Also, I liked that the first and second options were suspended chandeliers. Our wiring is centered in the ceiling, but we need the ability to shift the light to the left about 3 feet in order to center over our table.
With all of this in mind, we started dreaming up the perfect fixture for our space. Here is what we bought and how we put it all together:
s u p p l i e s
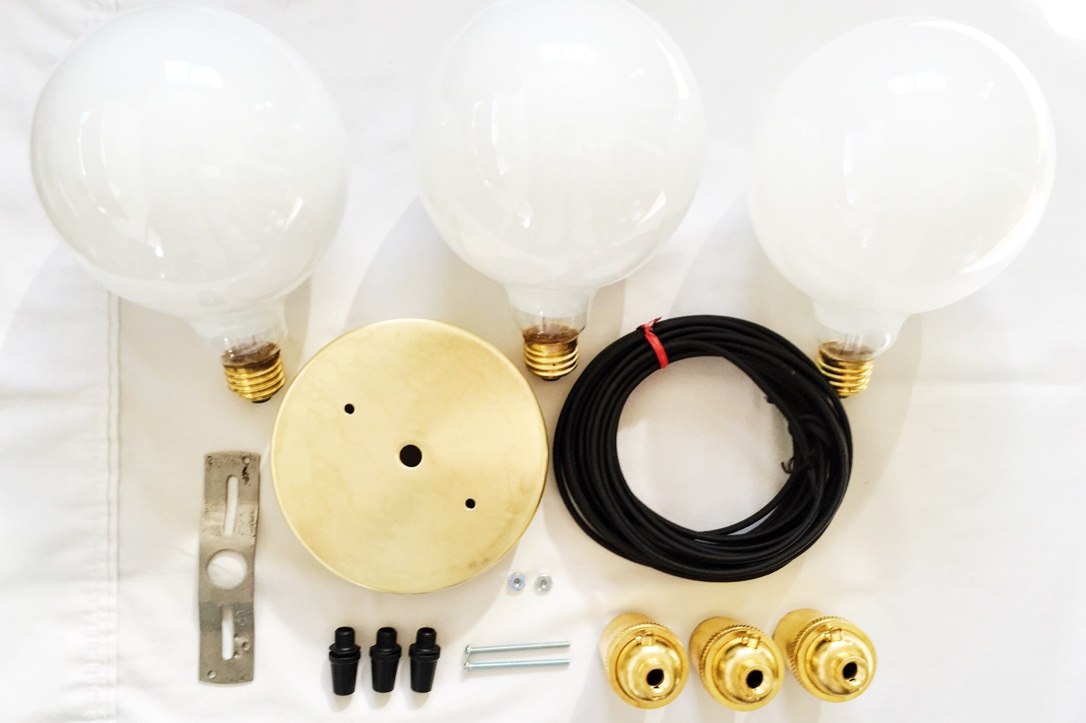
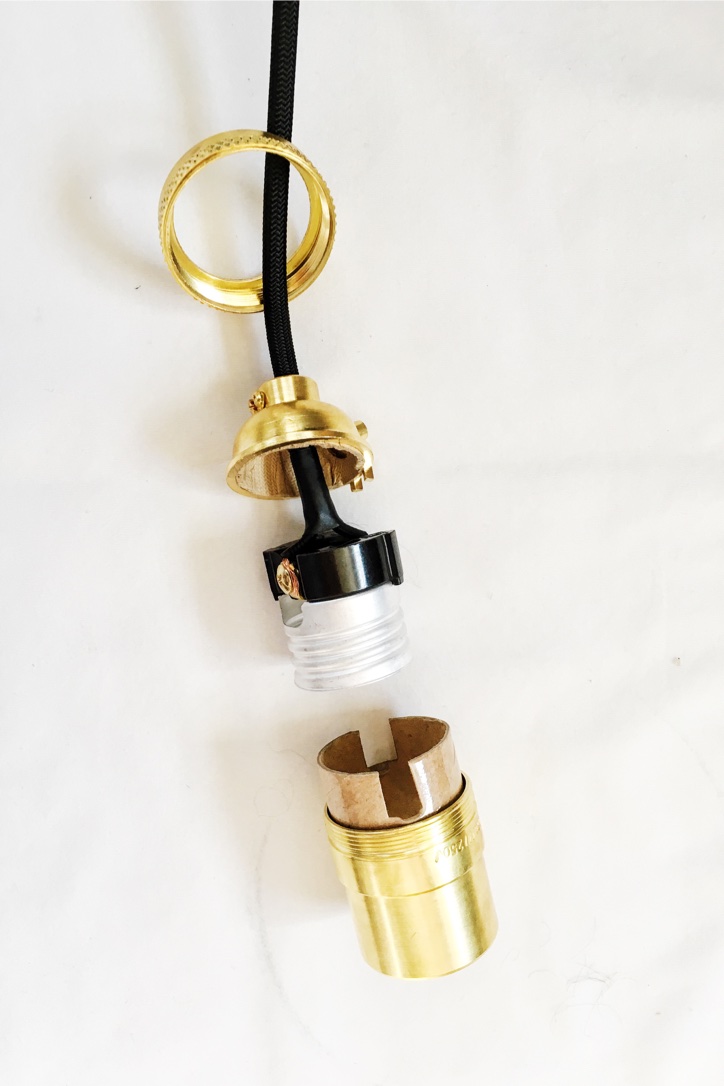
- (1) Unfinished brass canopy with 1/8ips center hole and mounting barholes – $12.40
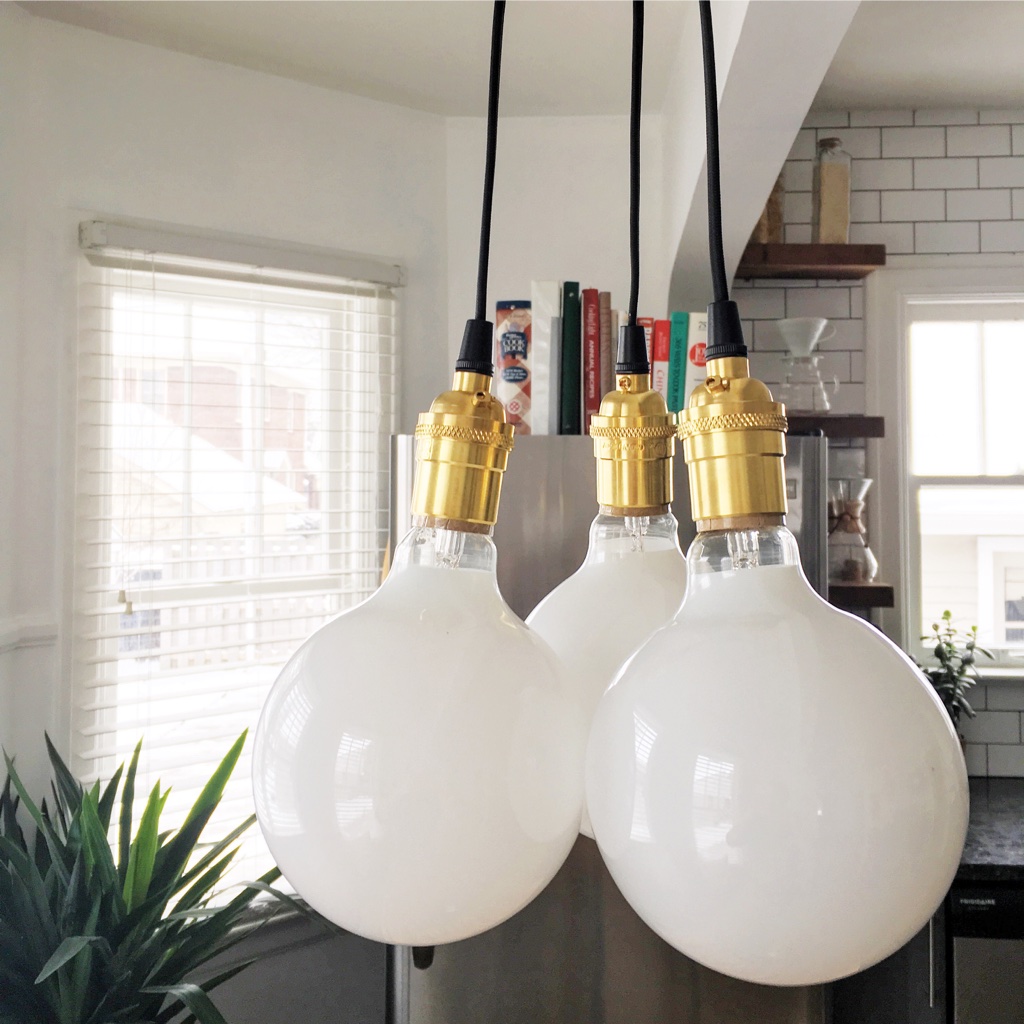
- (3) 40 watt 5in. globe white G-40 bulbs – $4.20 each
- (3) Unfinished brass keyless sockets – $8.20 each
- (3) Black powder coated strain reliefs – $0.85 each
- (1) 4in. steel crossbar with 8/32 tapped ground hole – $0.50
- (2) 6/32 x 1-1/2in. machine bolt round combo with nuts – $0.98/pack of 8
- (20ft) Black nylon braided wire – $1.00/ft
- Amount will vary depending on total length of fixture. Simply measure distance from ceiling, multiply by three and add a few extra feet of "just in case".
- (2) 3/8in. unfinished brass balls (not pictured) – $0.25 each
- Electrical tape (not pictured)
- Wire cutters (not pictured)
- Screw driver (not pictured)
- Box cutter (not pictured)
TOTAL: $74.13 + shipping/tax
i n s t r u c t i o n s
The first step is to gather all of your supplies, clean as necessary, and cut your black nylon covered wire to length. Be sure to leave plenty of extra length - just in case. You will need three equal length pieces.
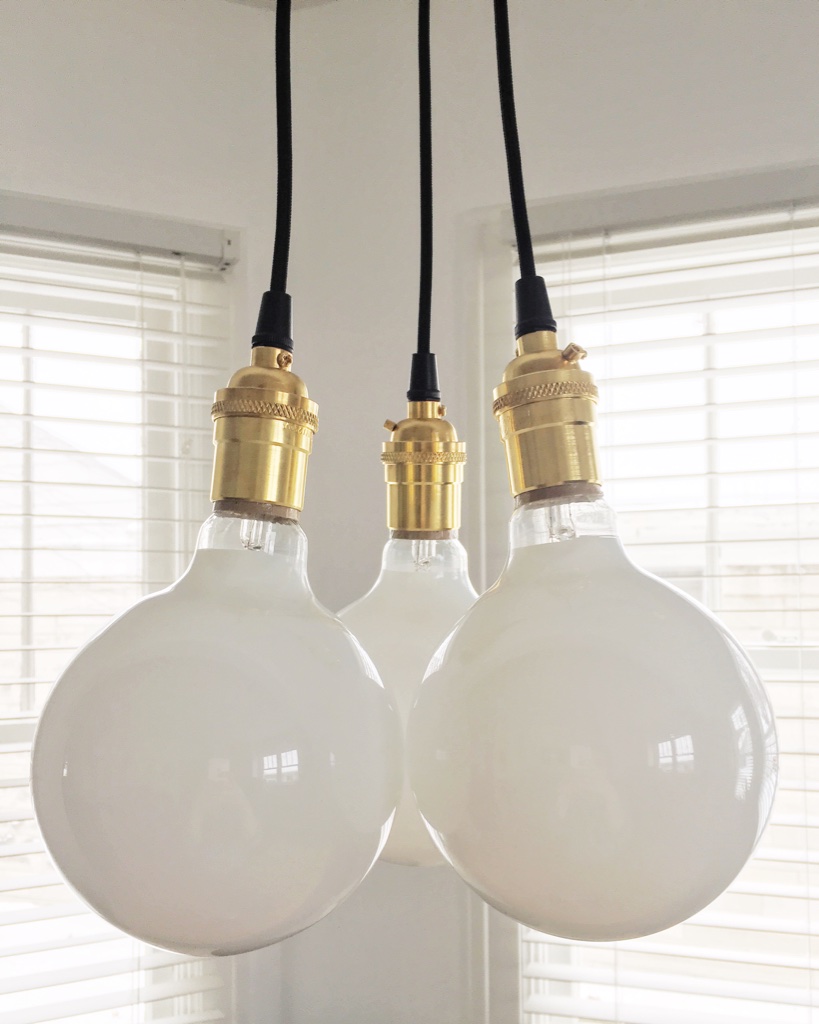
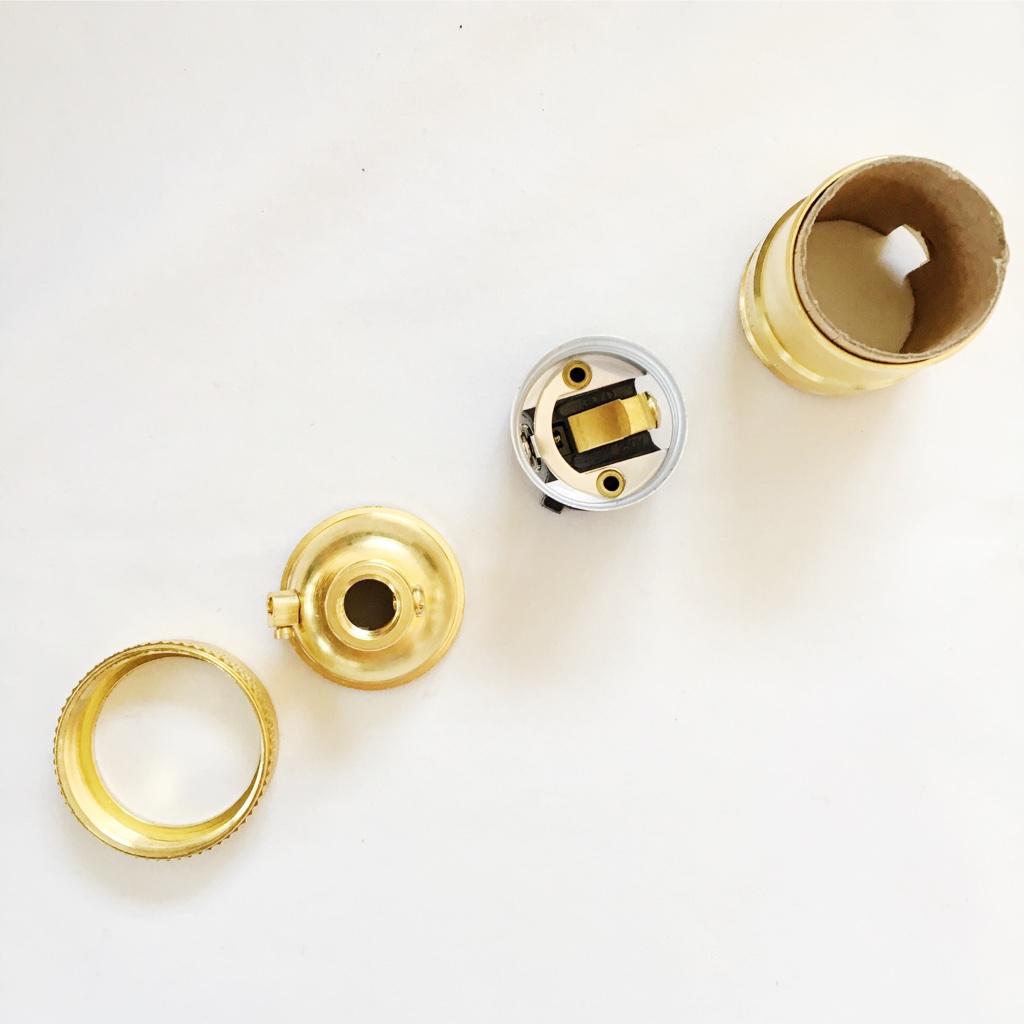
Next, begin taking apart one of the brass keyless sockets. The socket can be unscrewed by hand.
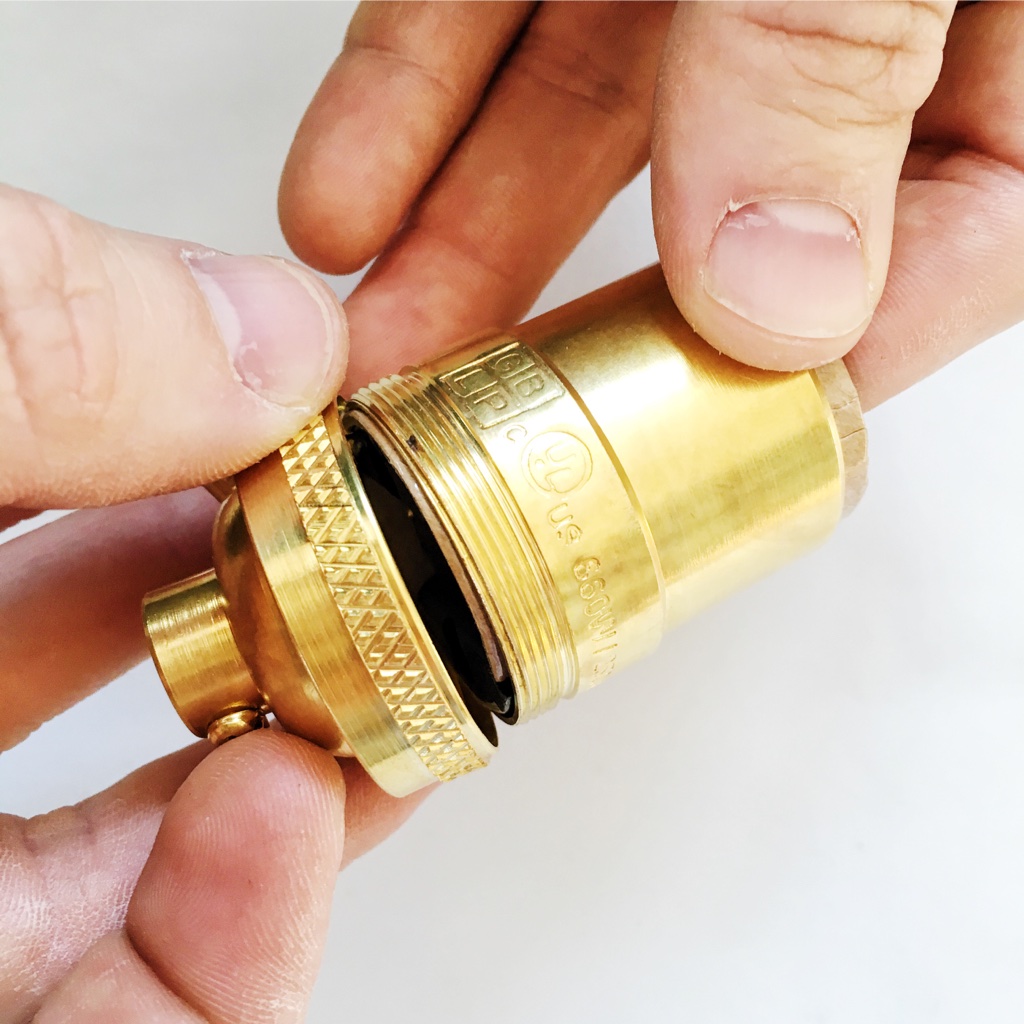
Once completely disassembled, you should have four socket pieces.
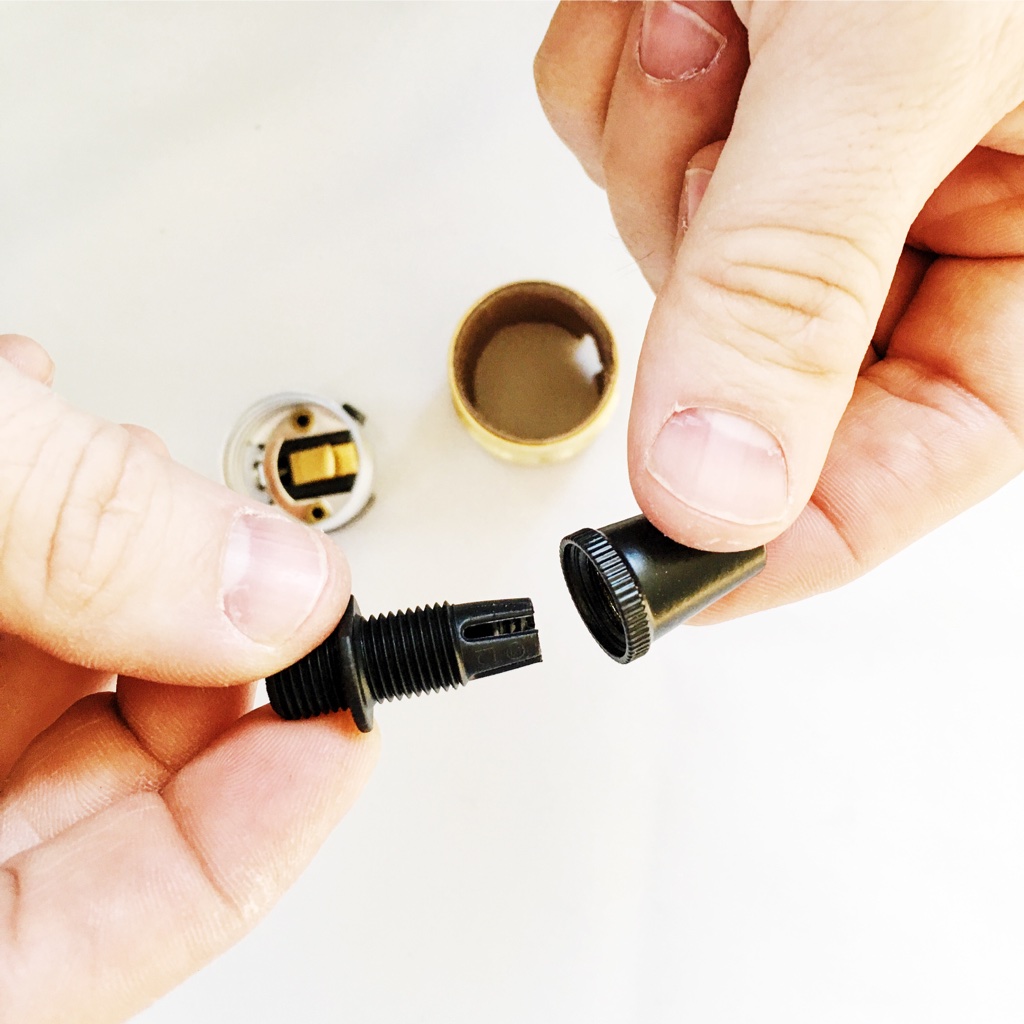
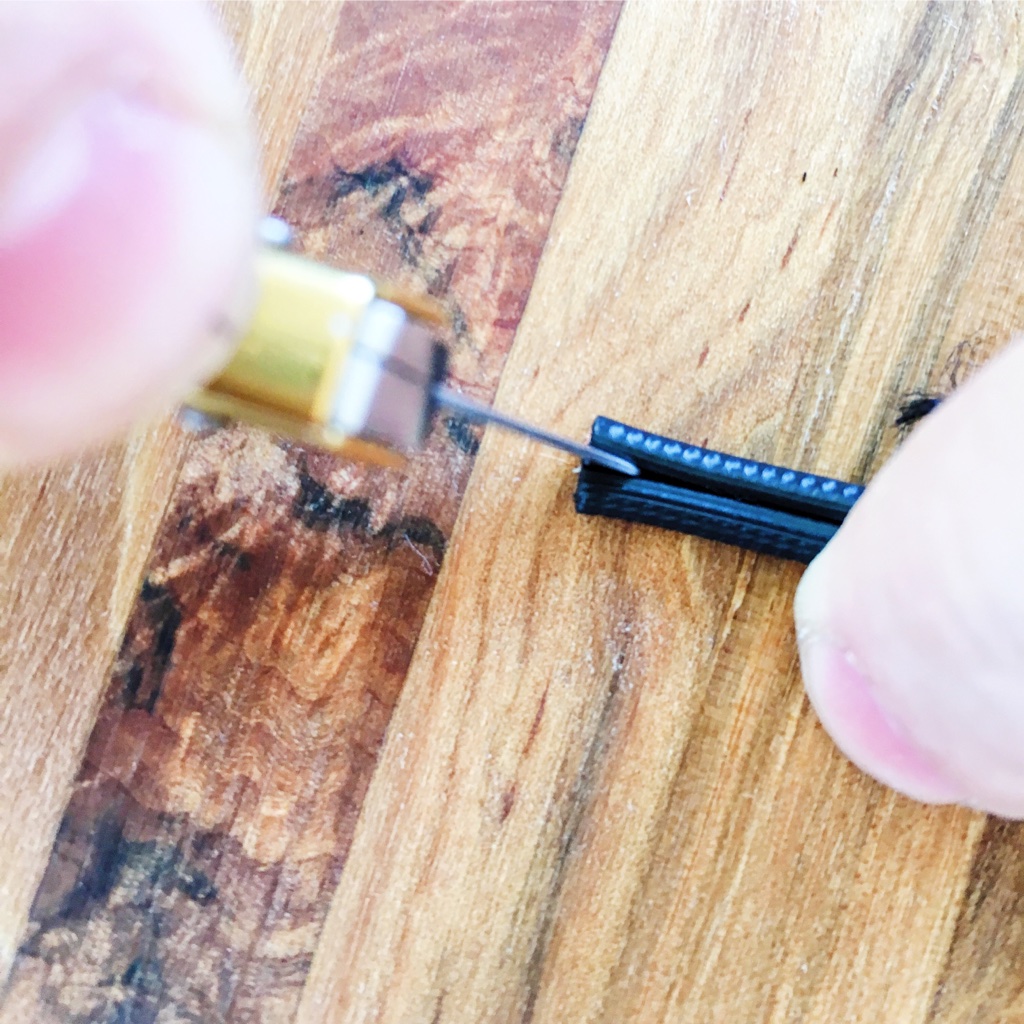
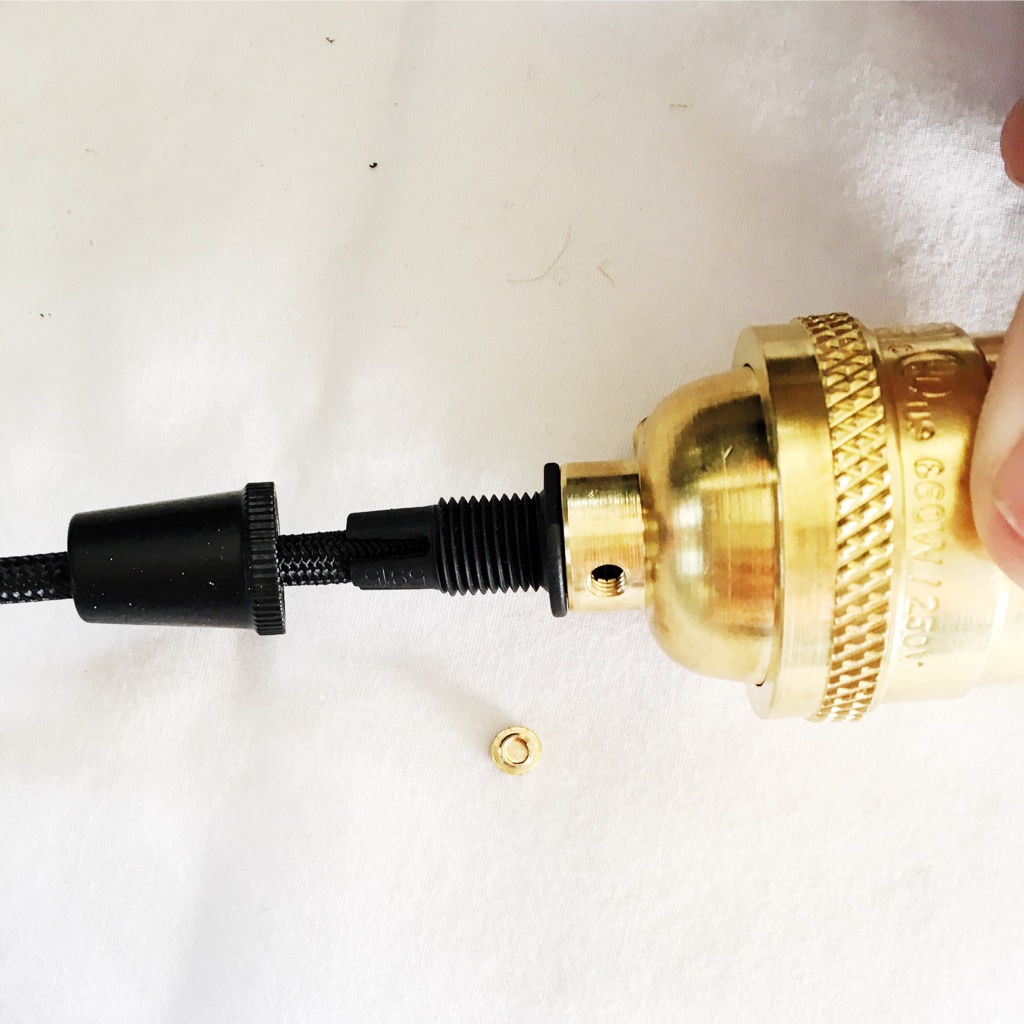
The next step is to disassemble one of the black powder coated strain reliefs.
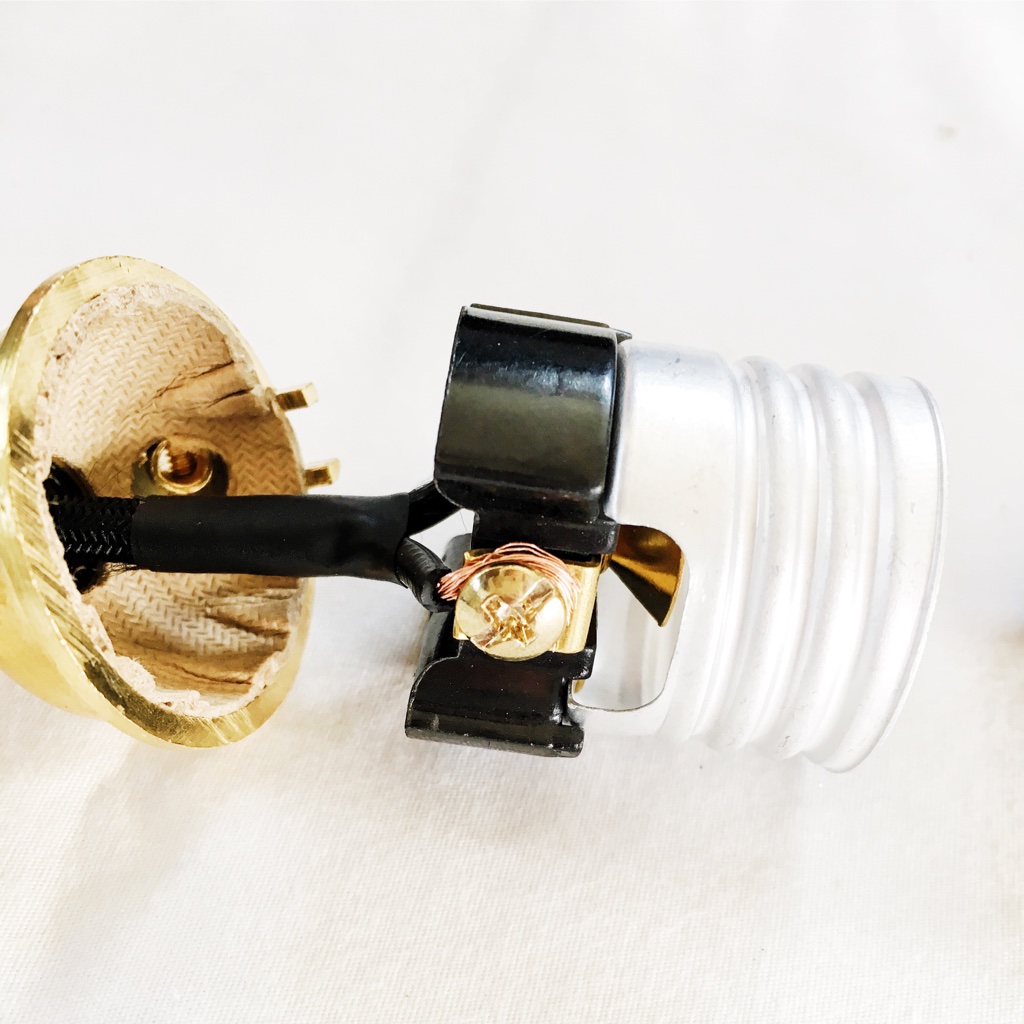
Feed one of your black nylon wires through the threaded piece of your strain relief along with the strain relief cover.
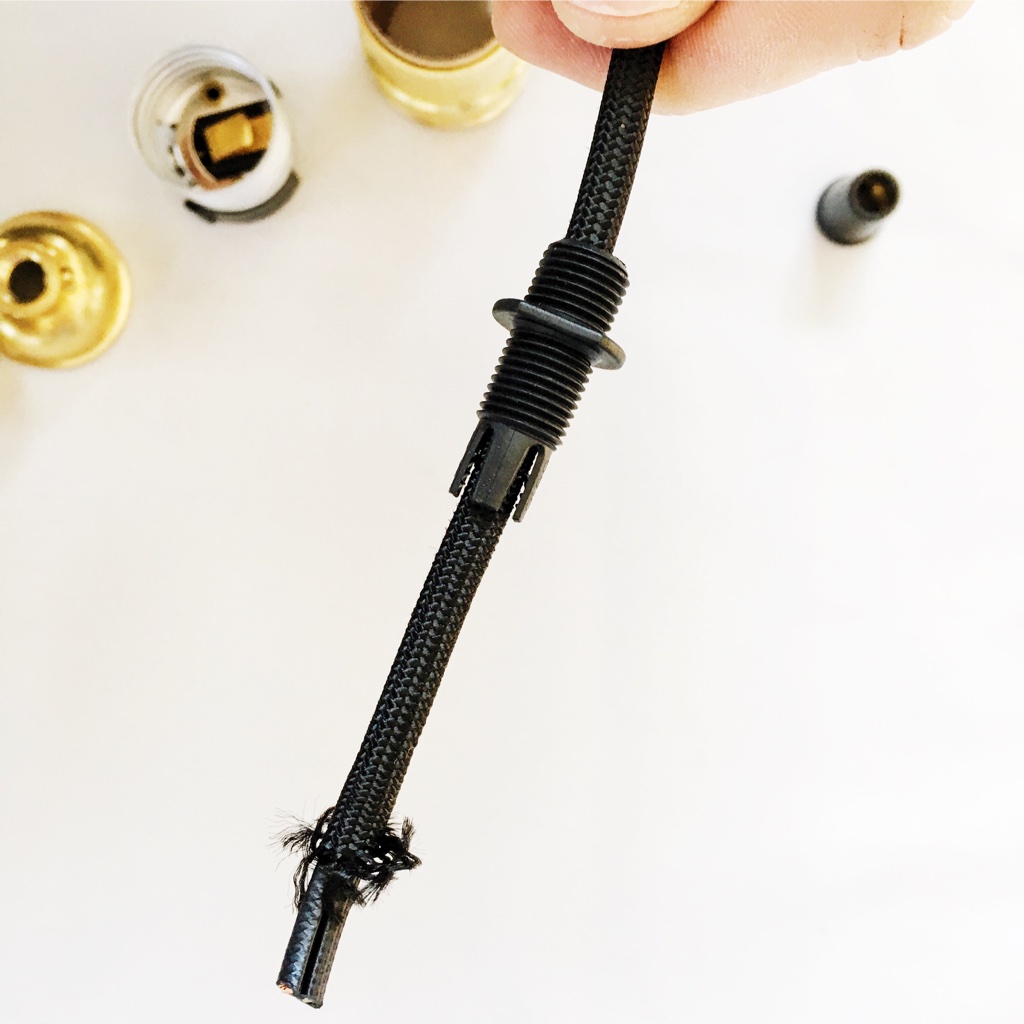
Move both pieces all the way down to the other end of your black nylon wire as shown below.
Next, remove ~1-2 inches of the black nylon covering from this end of your wire. You want to expose the covered wire underneath. Once exposed, make a very gentle cut to separate the two wires.
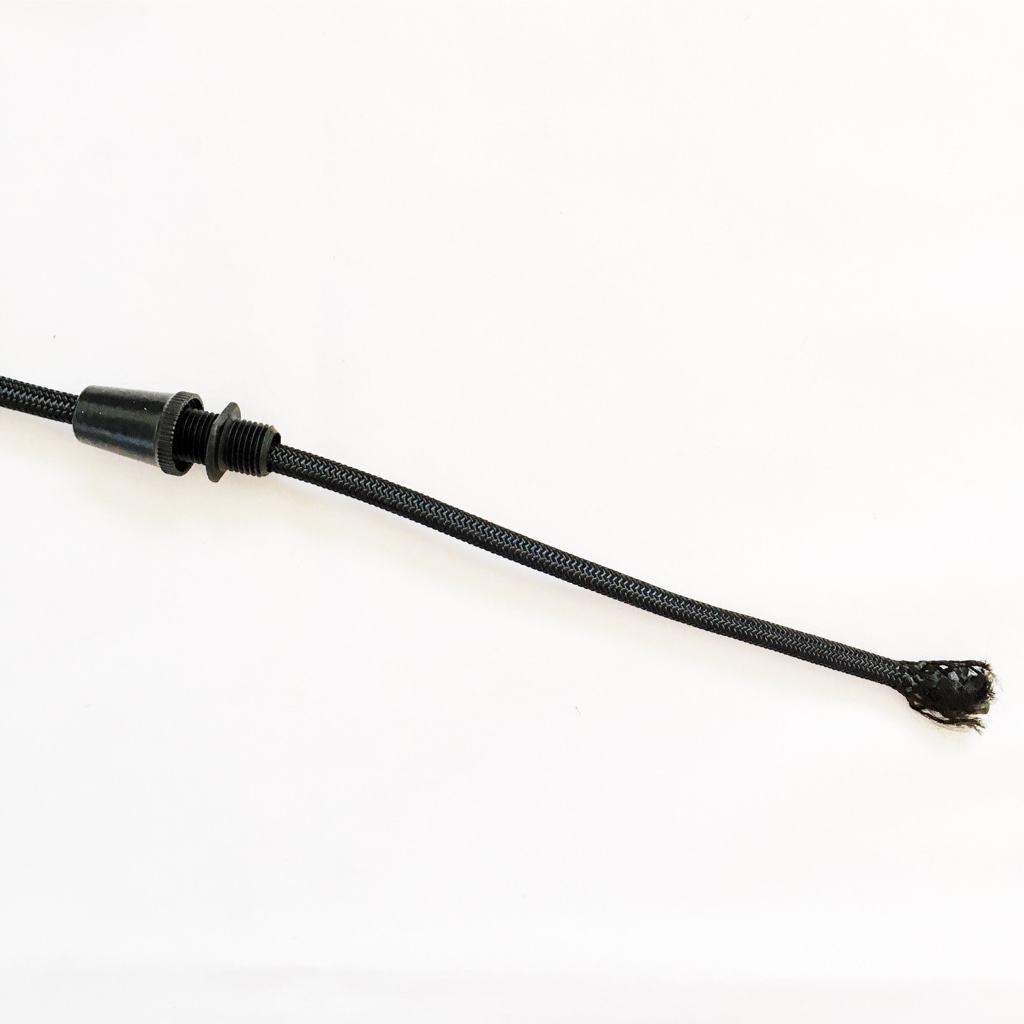
Once cut, pull apart the wires by hand until ~1-2 inches of each side is exposed. You need enough length to reach each side of your socket.
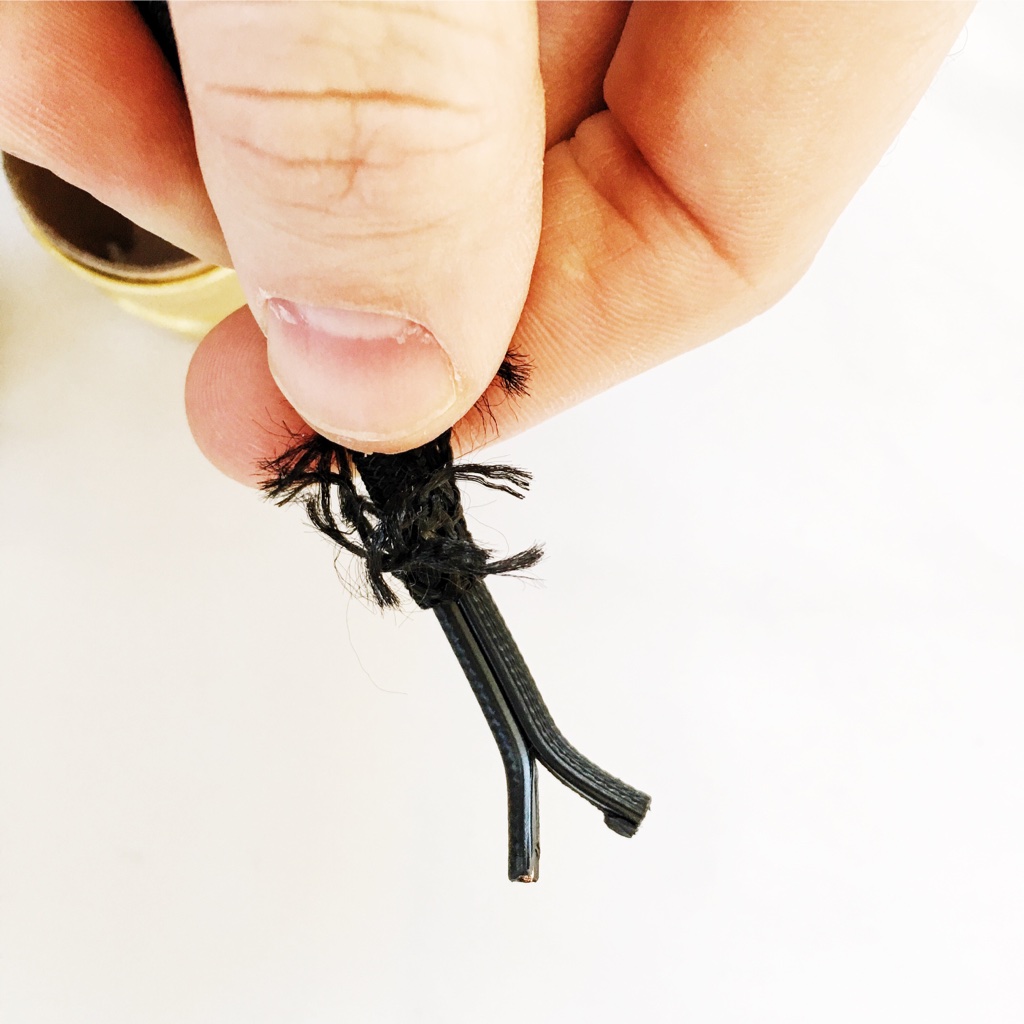
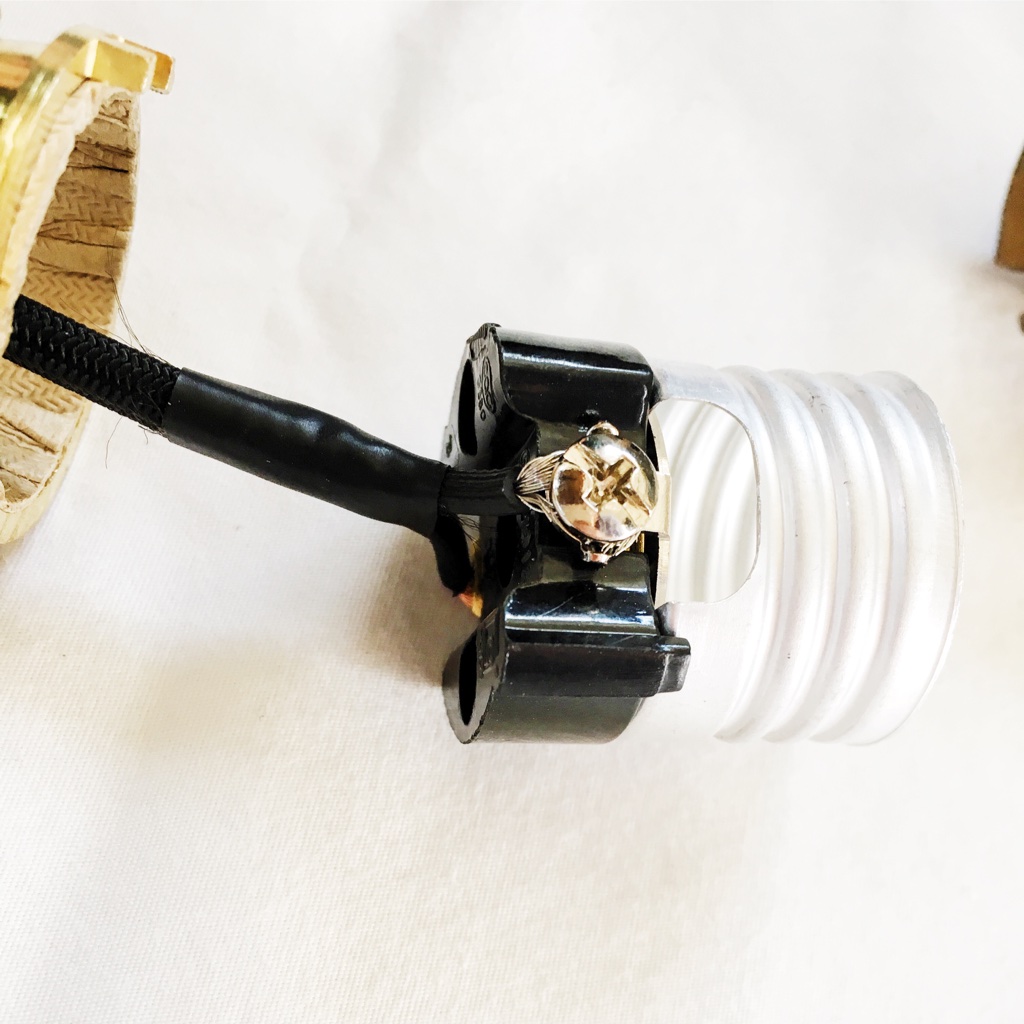
Once separated, secure the nylon with electrical tape to prevent unraveling and strip your wire coating.
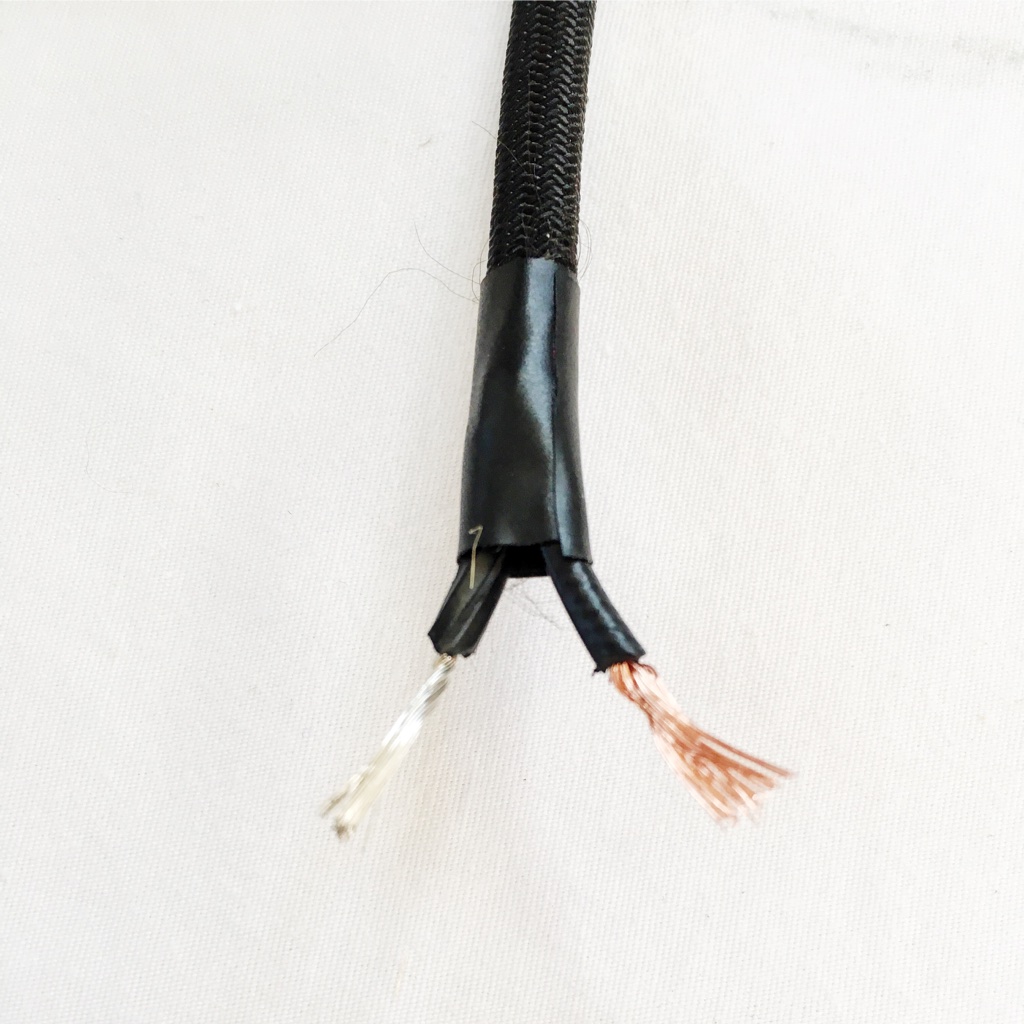
After the wires are stripped, insert the top two pieces of your brass socket onto your nylon wire and then attach your stripped wires to the socket screws. Remember: White --> Silver ; Black/Copper --> Gold. Be sure to tighten each screw to secure.
Once wires are securely fastened, assemble your four socket pieces back together.
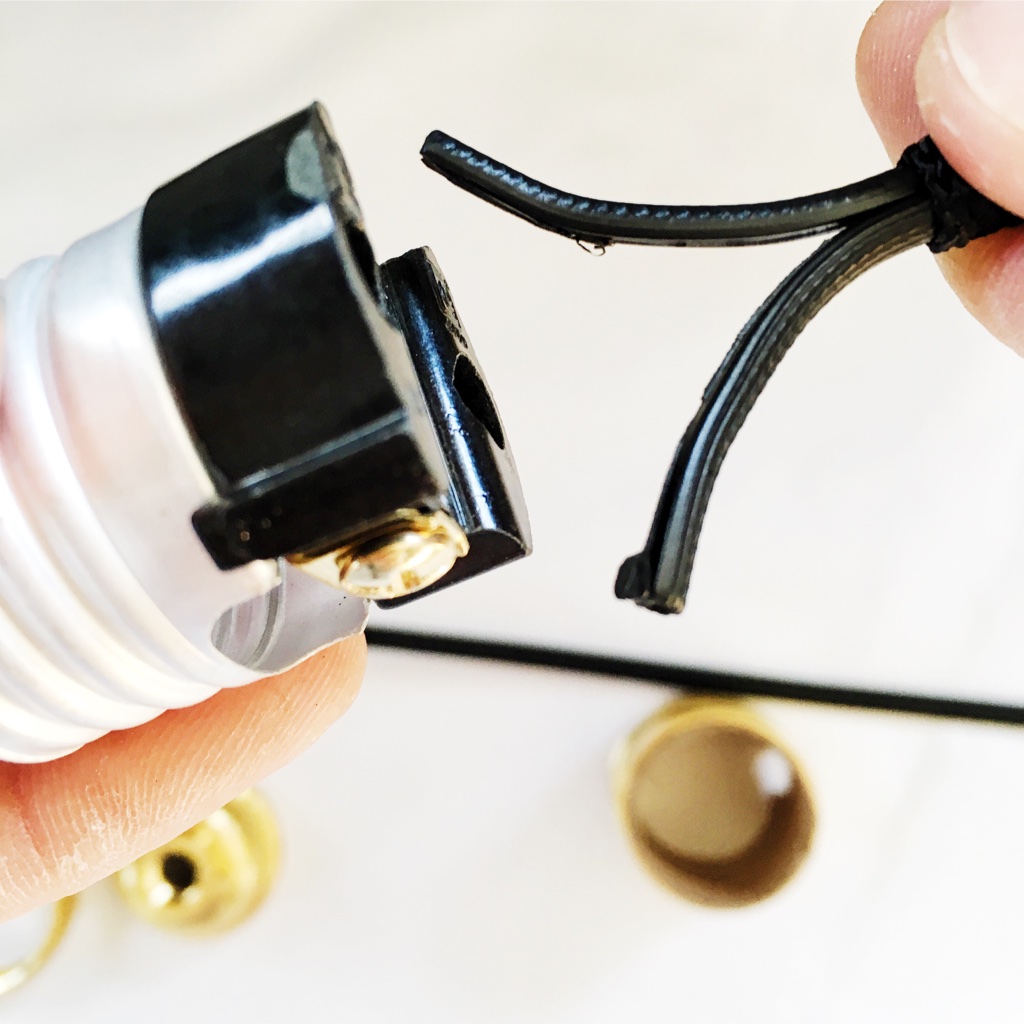
Feed the end of your threaded strain relief into the top of your brass socket and use the provided screw to secure the two together.
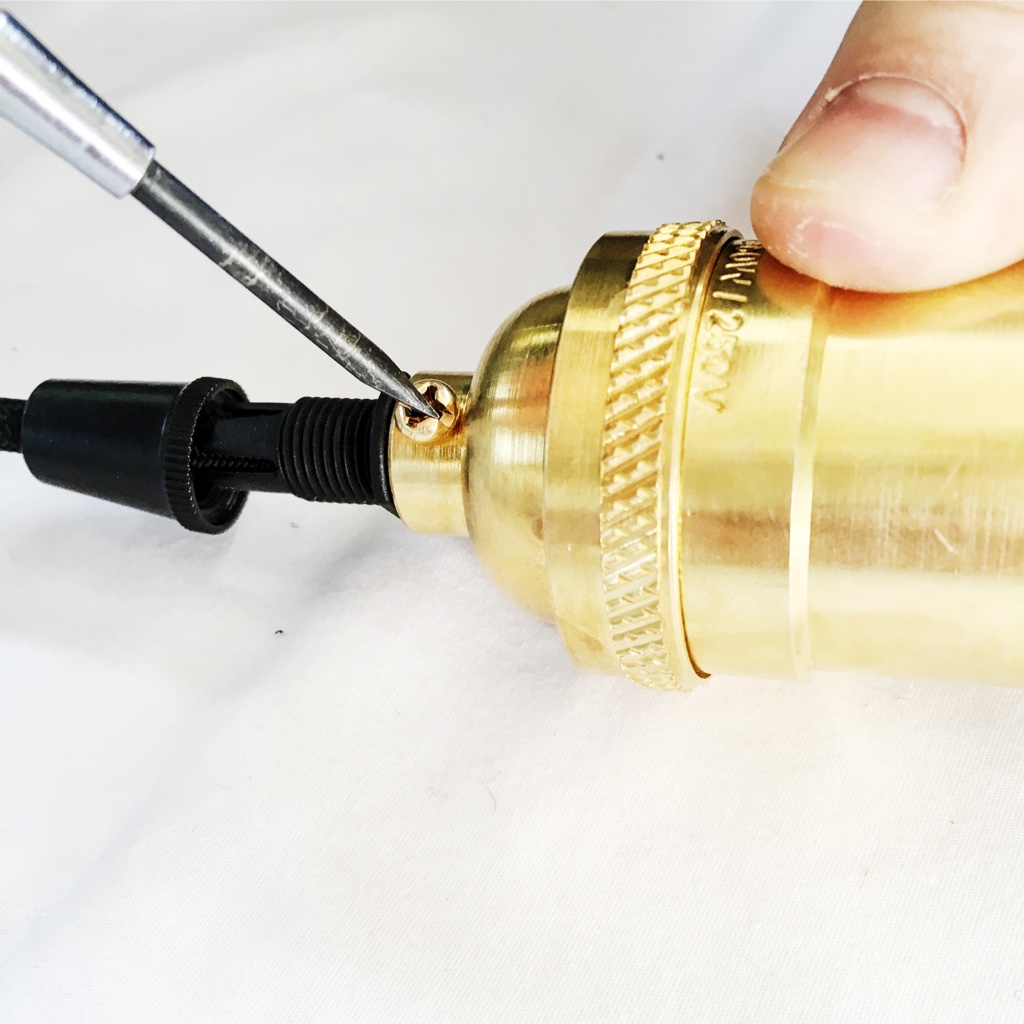
Screw your strain relief cover over the top.
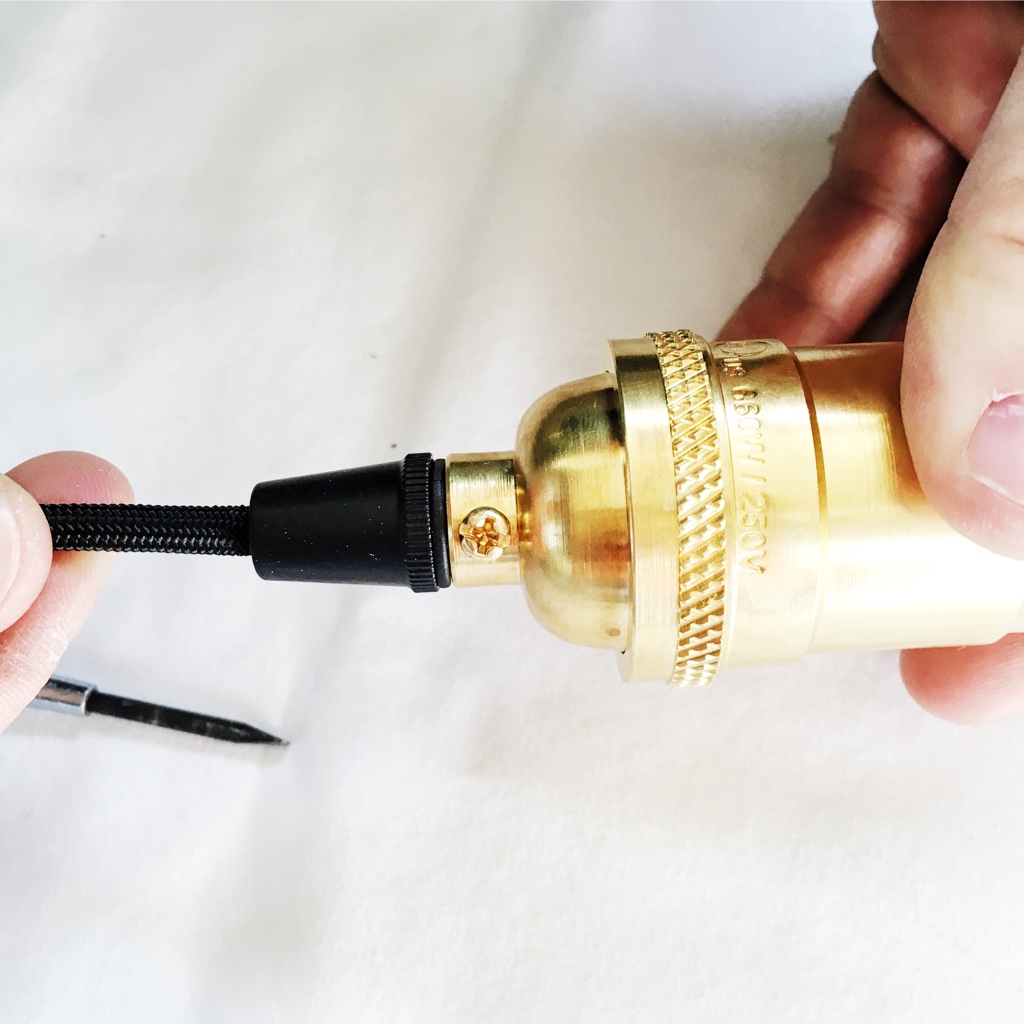
One down! Repeat the above steps two more times. We want three wired sockets before proceeding to the next step.
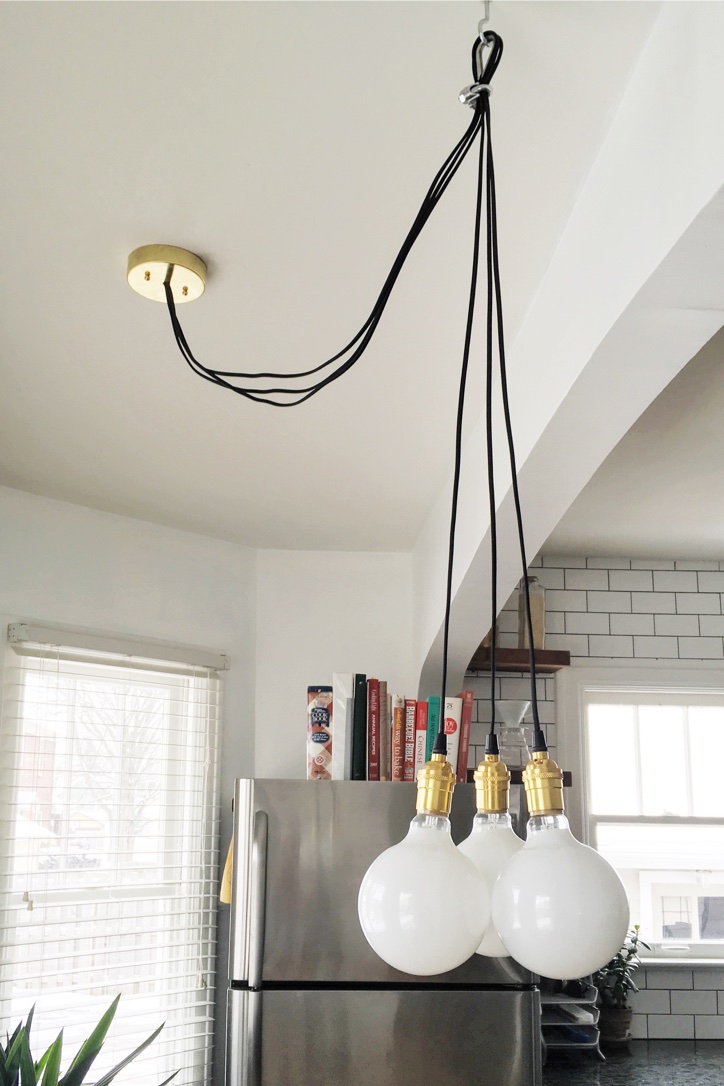
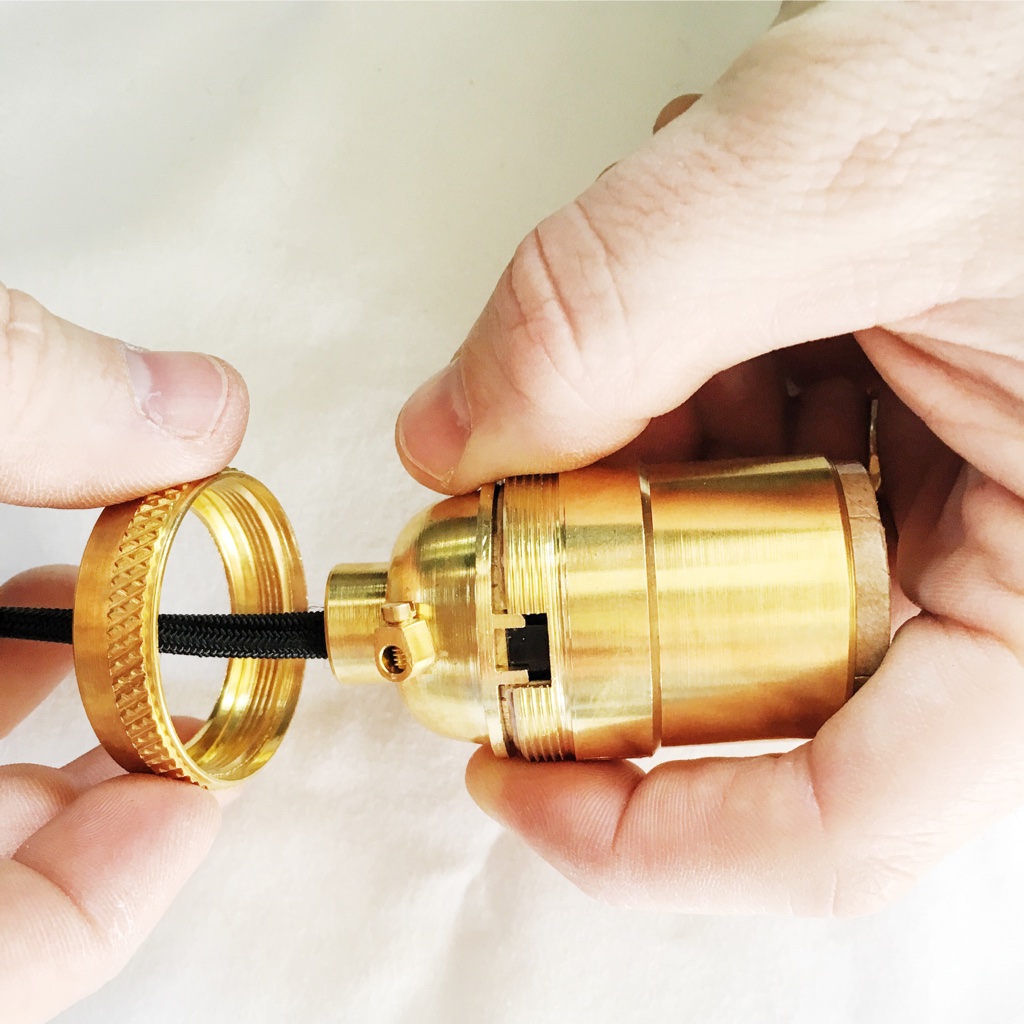
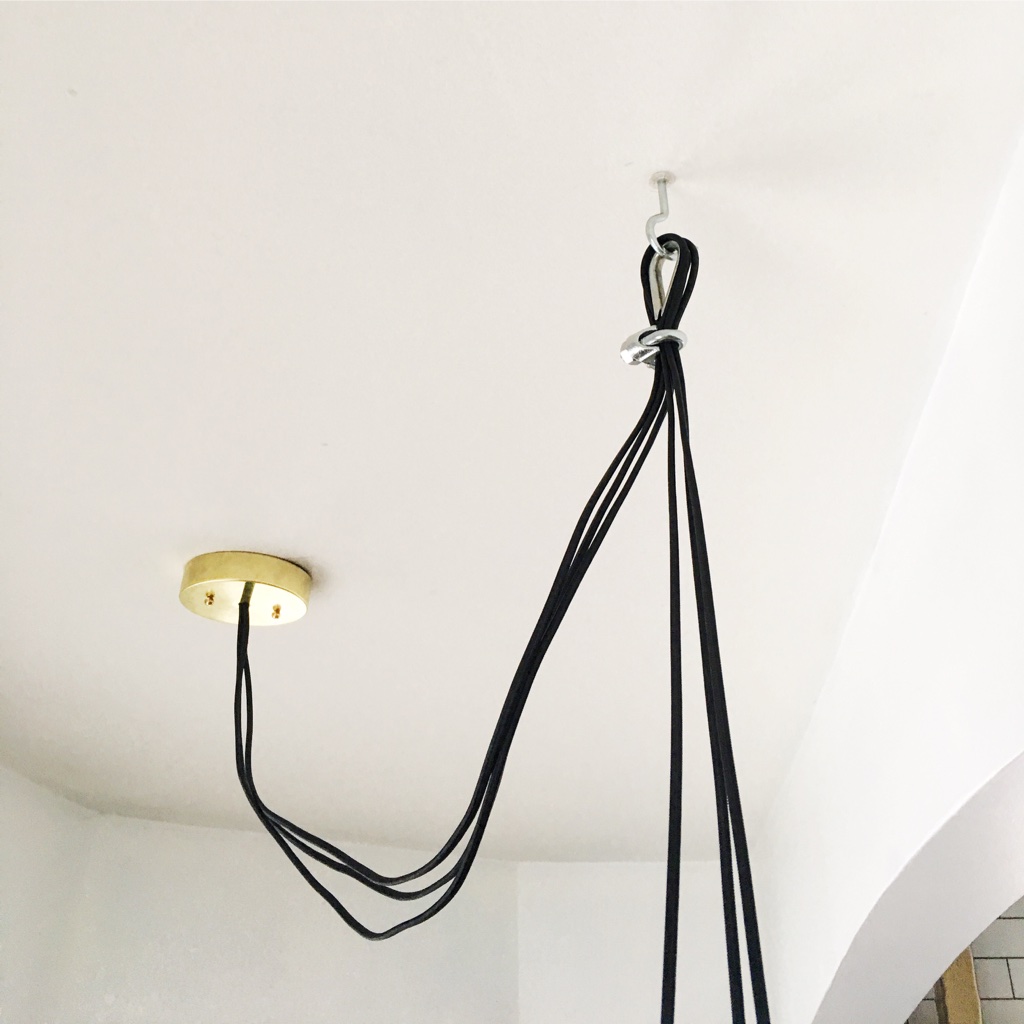
Once all three sockets have been wired, feed all of the nylon wires through the middle hole of your brass canopy. It's kind of a tight fit, but you should be able to squeeze it. At this point you are ready to attach the fixture to the ceiling!
PLEASE NOTE: All electricity should be OFF before proceeding. If you are not comfortable with electrical work, please hire a professional.
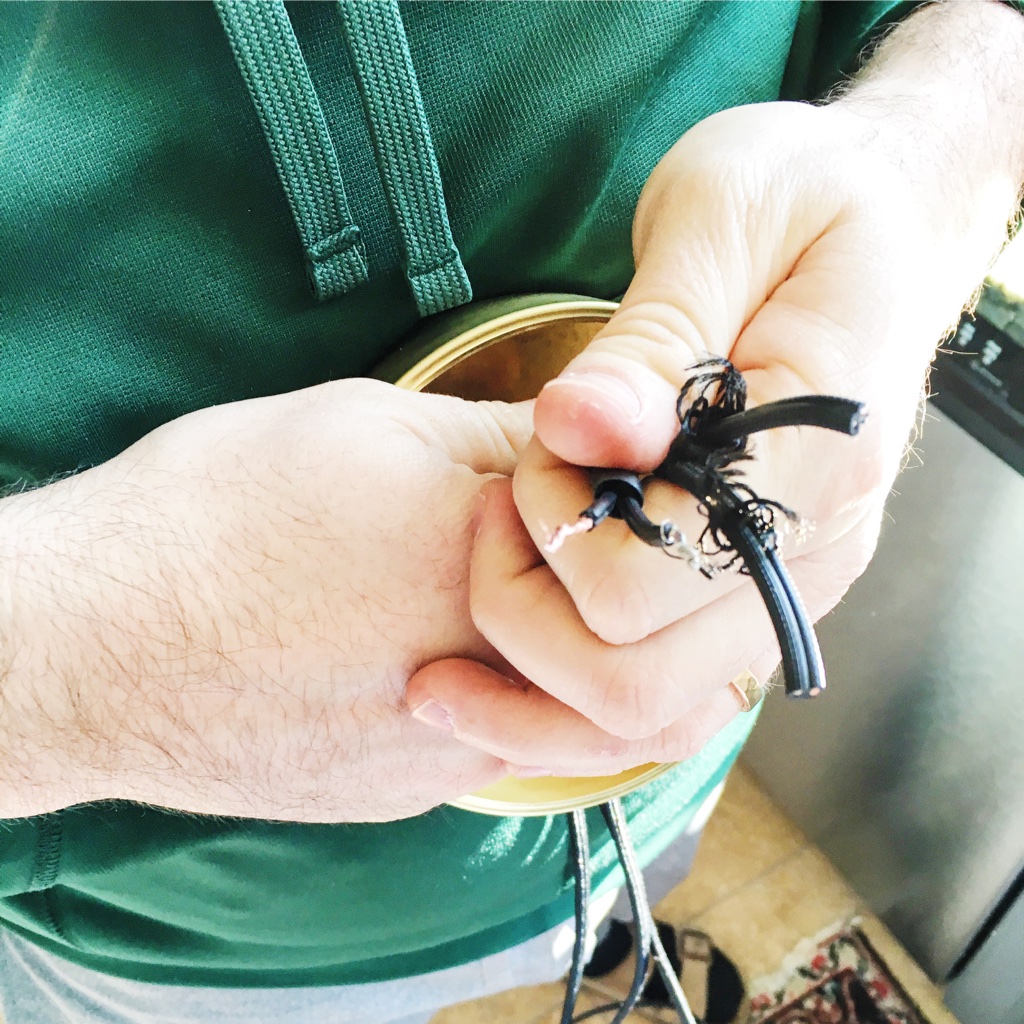
Remove ~1-2 inches of the nylon cover from each wire, cut gently to separate the wires, and then strip each to expose ~1 inch of wire. We want to secure all three silver wires together and all three copper wires together.
Connect the silver wire bundle to your silver/white wire in the ceiling. Secure using a wire connector and electrical tape. Repeat for your copper/black wires.
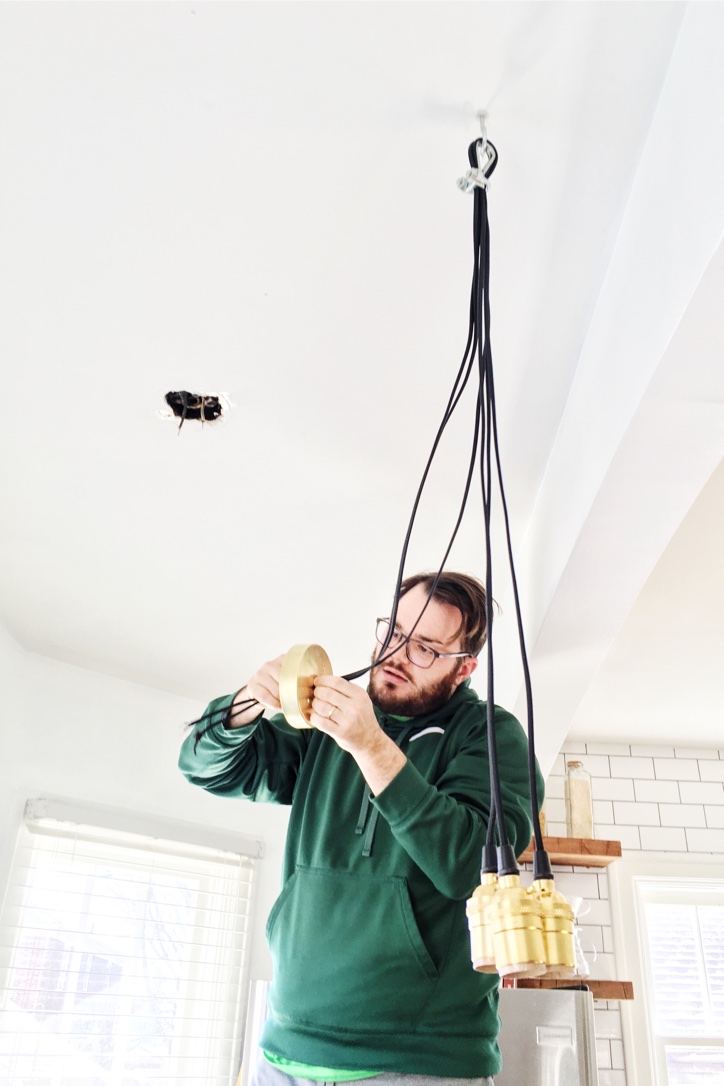
Once connected appropriately, secure your brass canopy to the ceiling using your steel crossbar, machine bolts and brass balls.
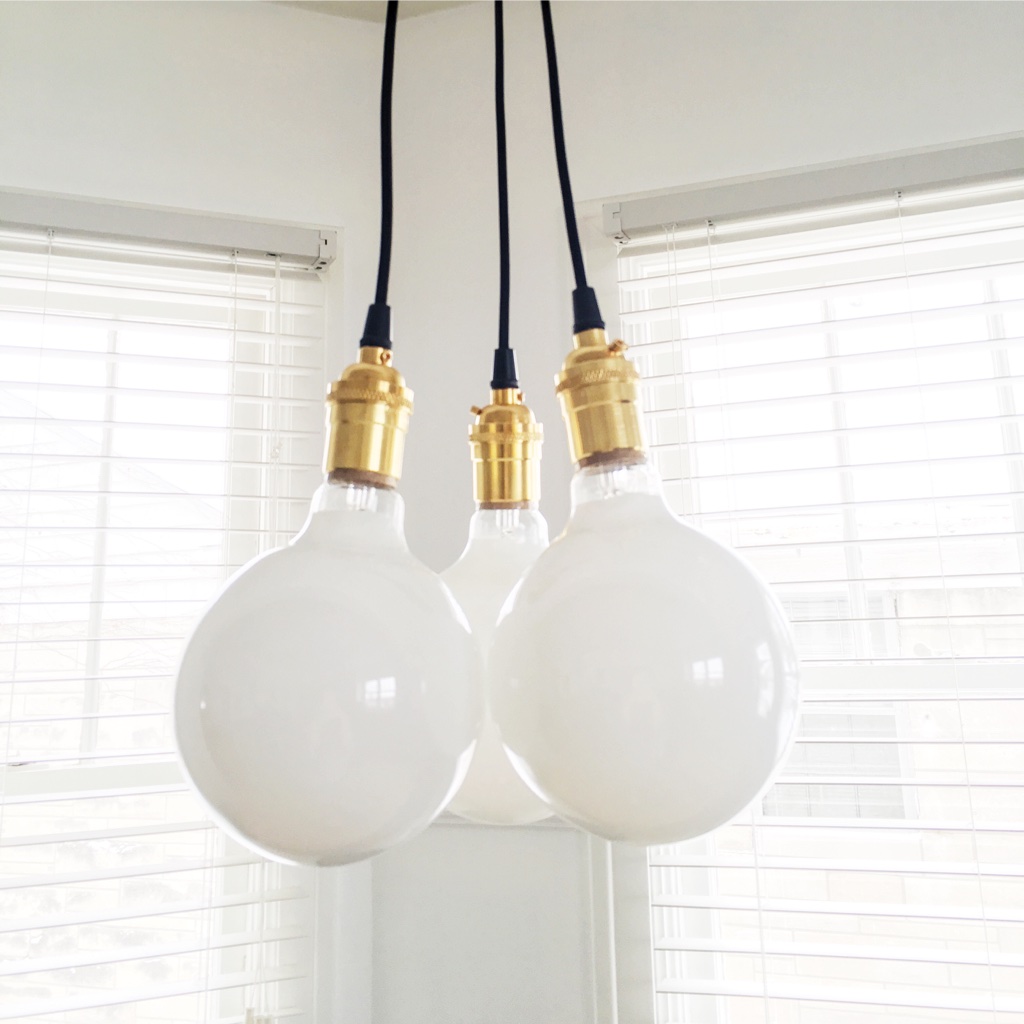
Finally, screw in your lightbulbs and voila!
Here is what the space looked like before...
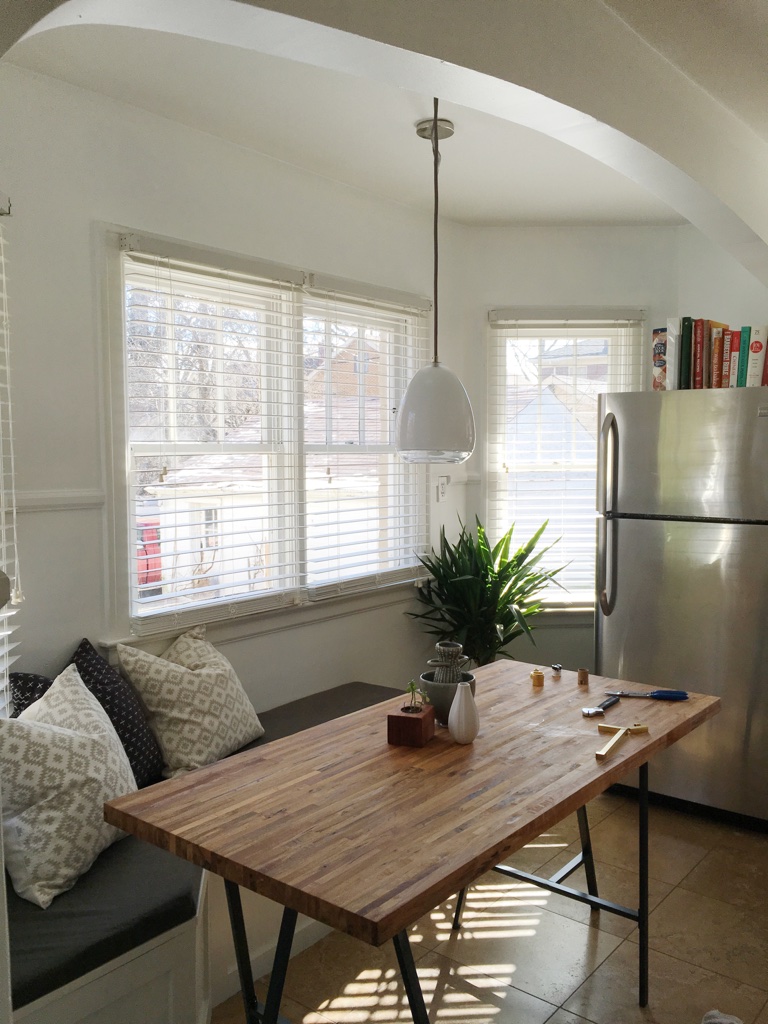
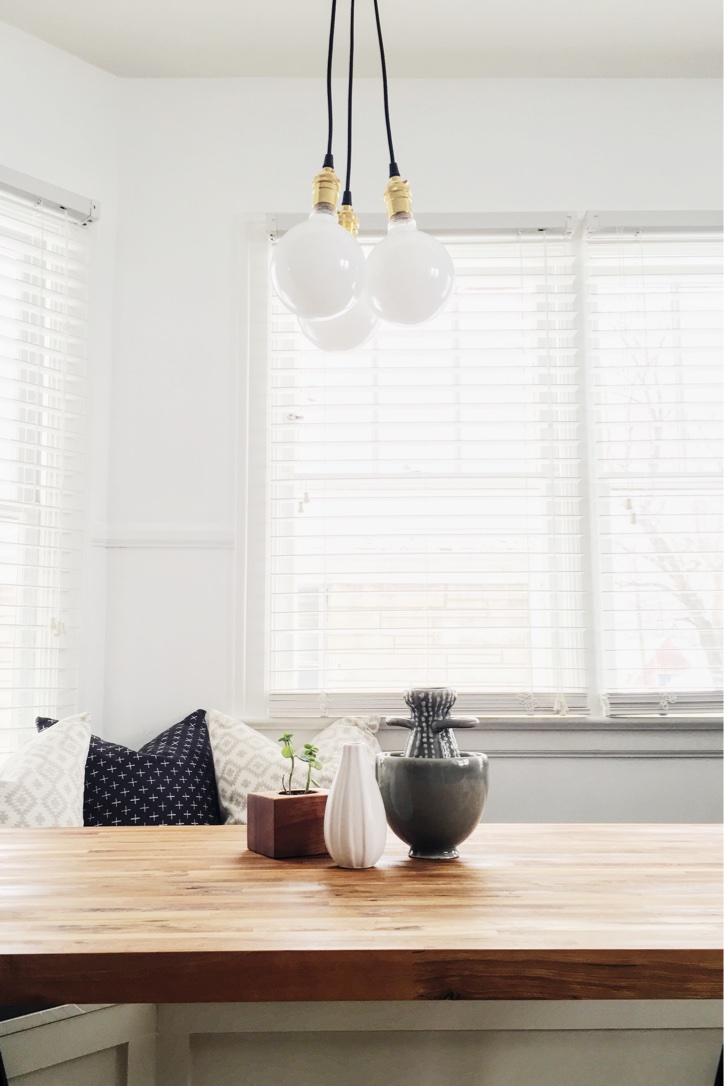
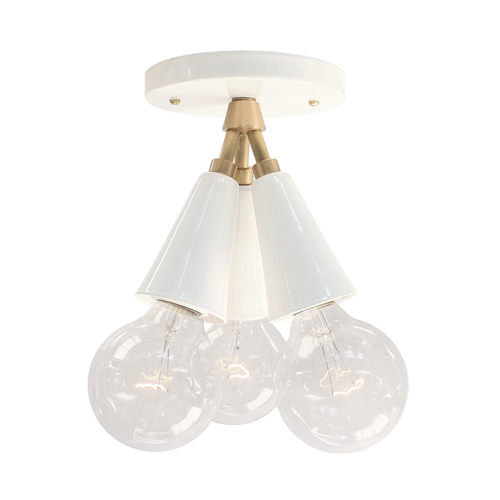
And here is the after! The space feels lighter and a heck of a lot more fun. The imperfect nylon swag gives it a great casual feel which is perfect for a kitchen nook. At half the cost of other retailers, this DIY is a win-win!